1967 Camaro Muncie shifter update to Hurst Competition Plus
Installing a Hurst Competition Plus in place of the factory Muncie shifter.
Mark Ehlen- MCR Staff
There probably hasn’t been anyone who’s ever driven any type of performance car with a clutch (or even an ordinary driver for that matter) that hasn’t been tempted to “pull a gear”, usually second gear, just for the thrill of seeing how fast one could change gears under power. Even better if one could “chirp” the tires in the process.
While this can be done with a stock shifter, performance enthusiasts tend to find them a less than positive experience. Drag racers in particular demanded a quicker, more positive shifter so way back in 1965, the Hurst Competition Plus shifter was designed for that market and it has remained unchanged in all these years since.
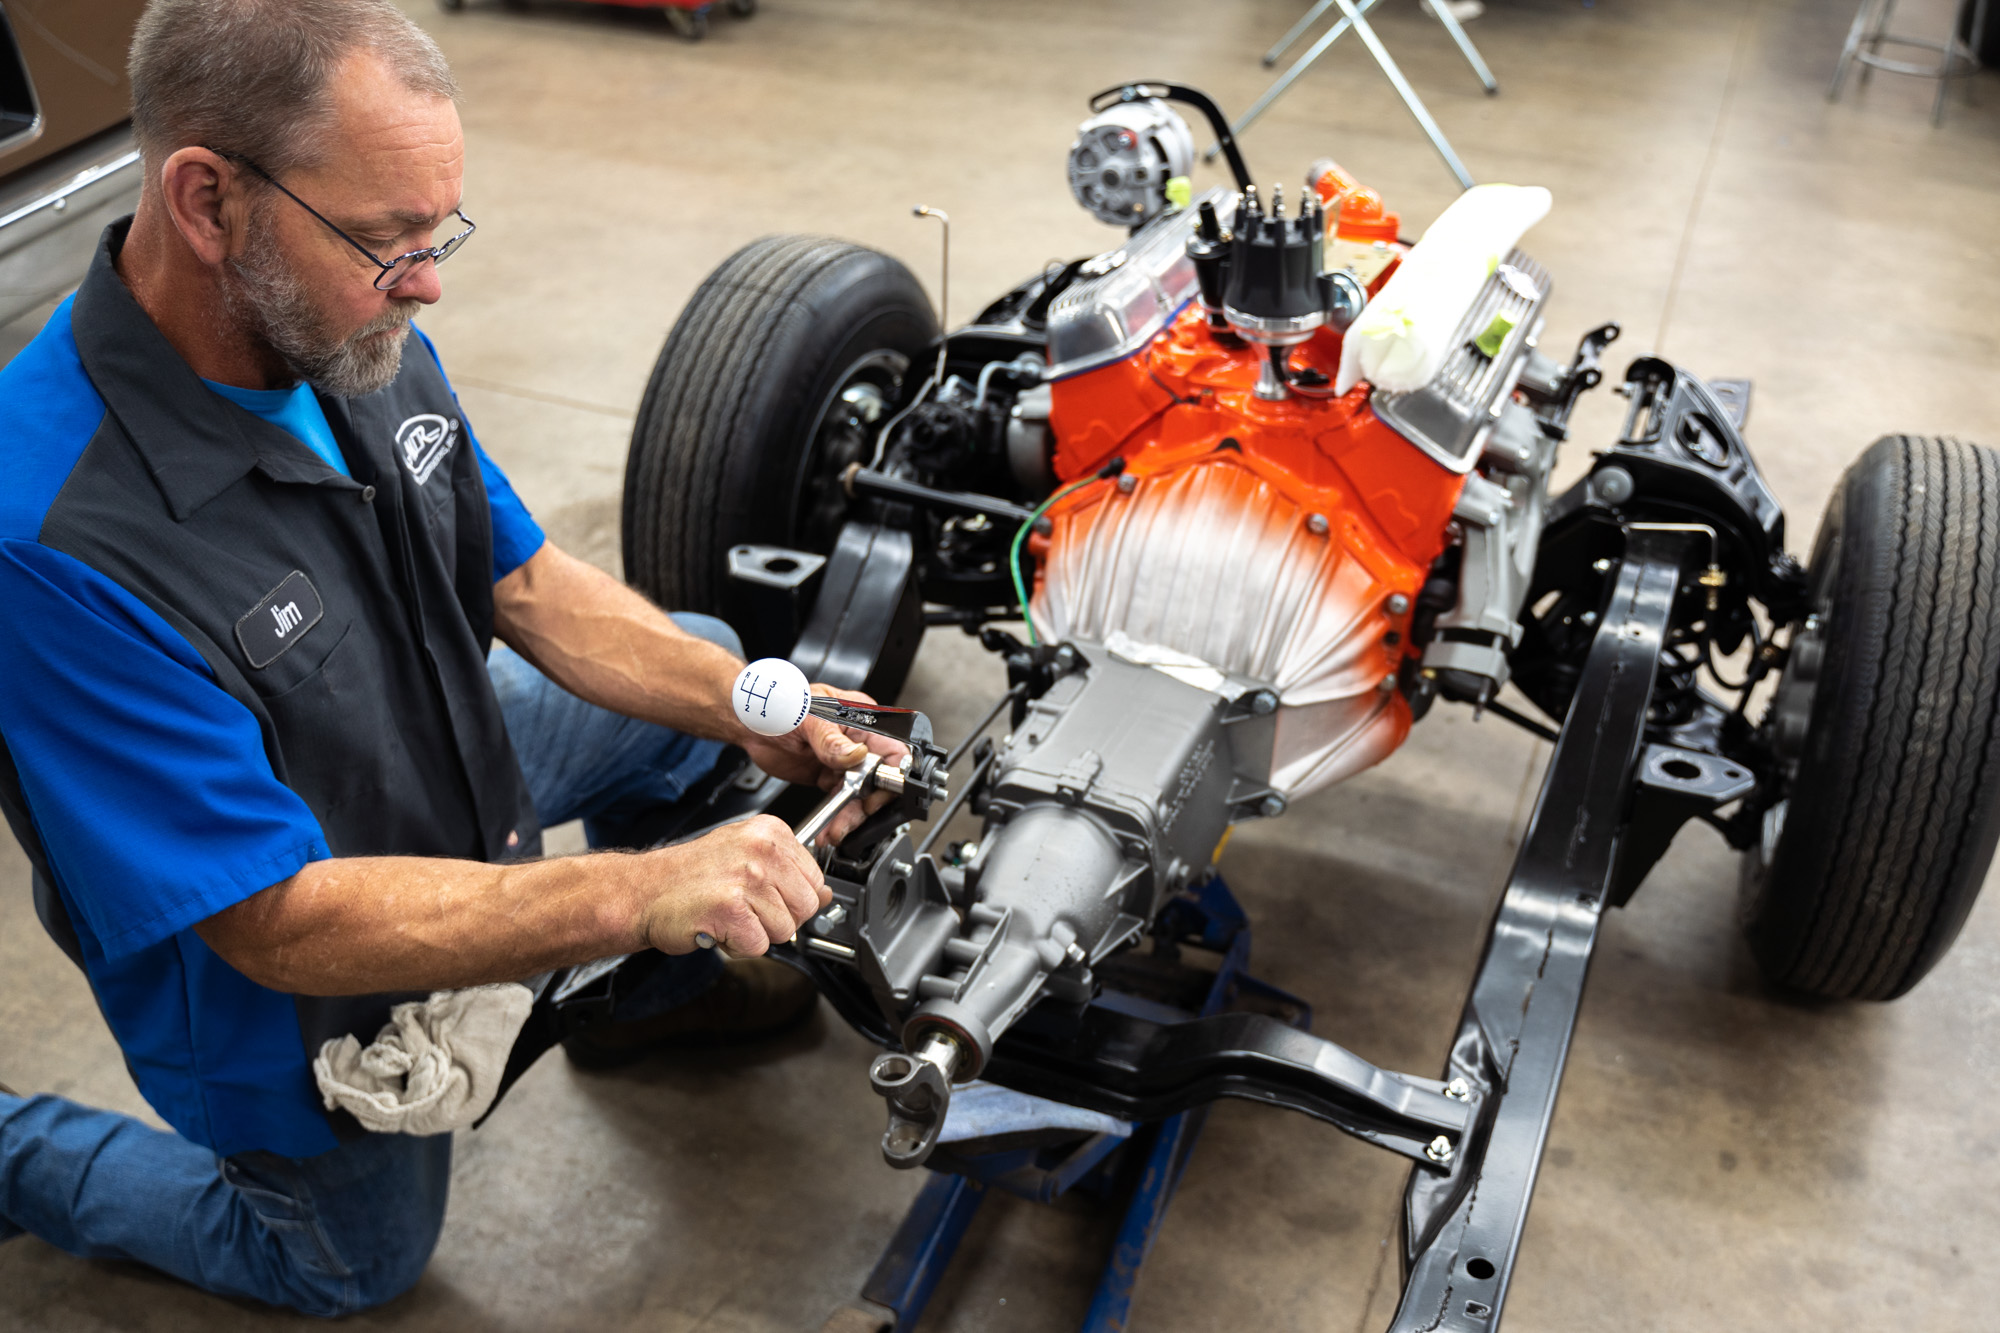
One of the real benefits of the Competition Plus is its ability to fit within a stock console without any modifications so it is a natural for any restoration project. The handle looks stock yet it has a race proven design under it. That’s the reason these are MCR’s go to shifter for these types of applications. Installation of a Competition Plus is pretty straight forward but there are a couple of things to pay attention to.
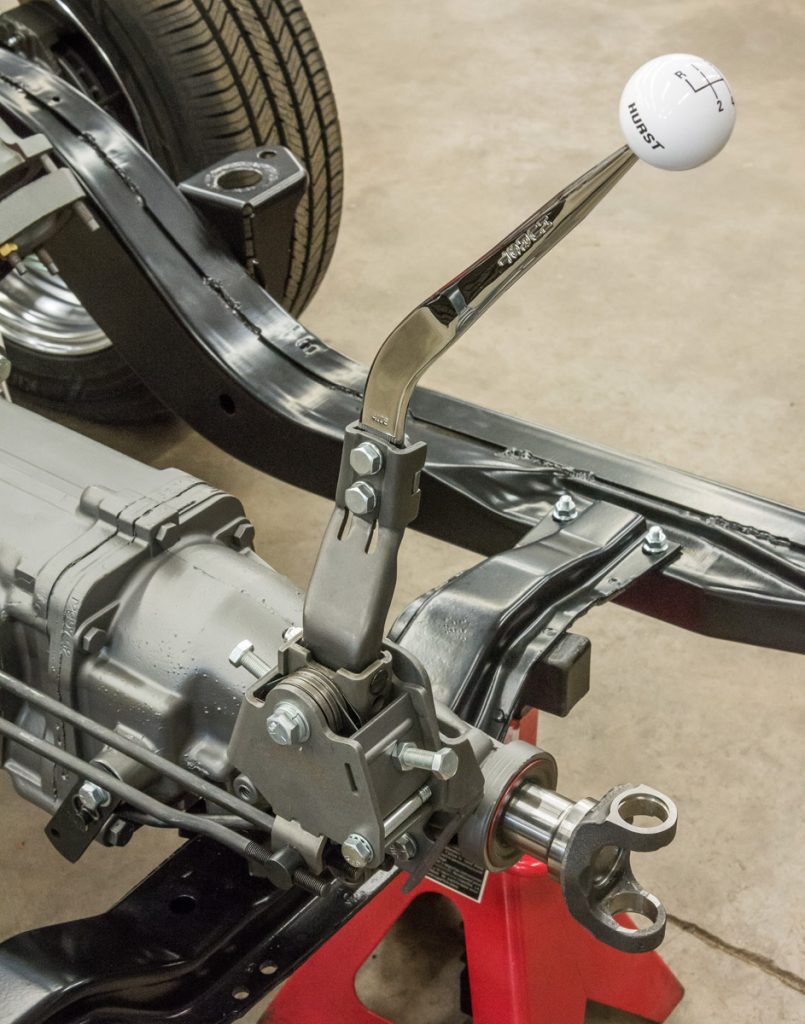
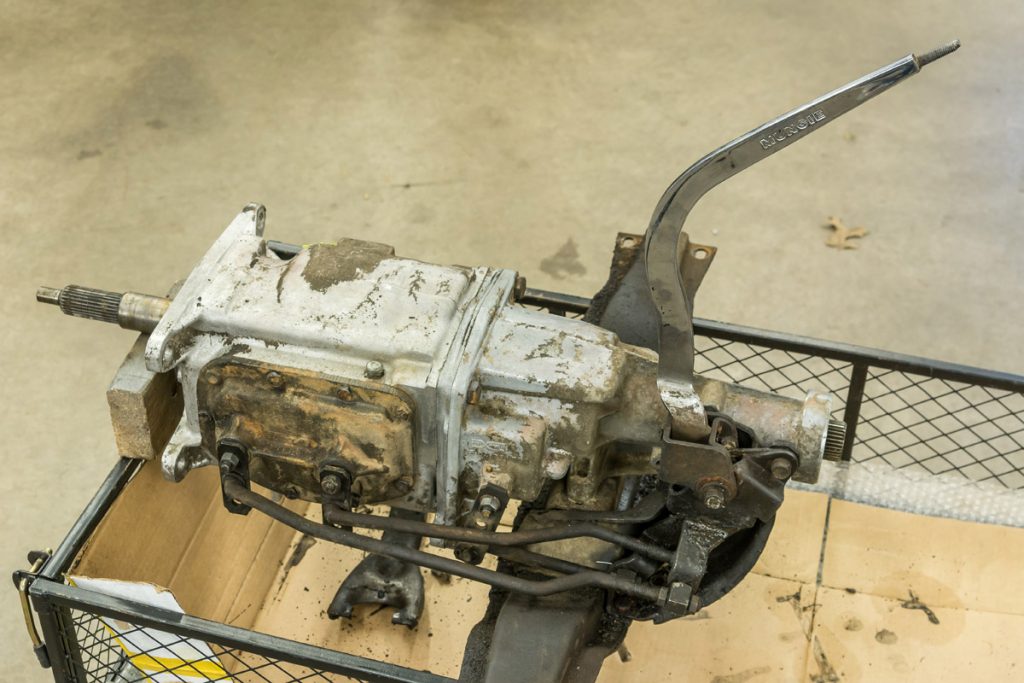
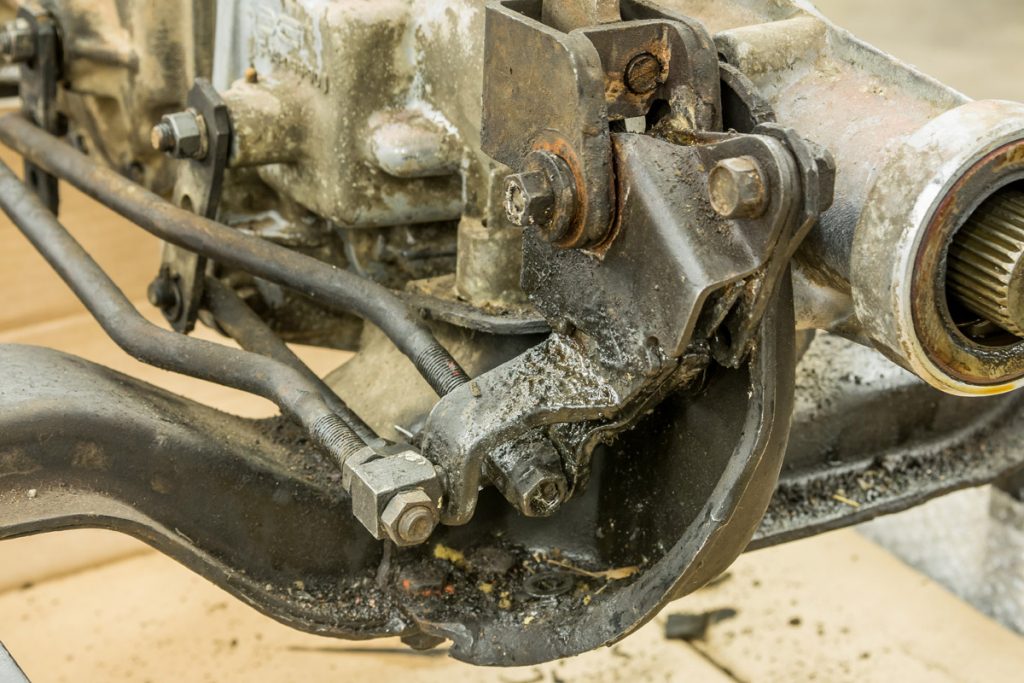
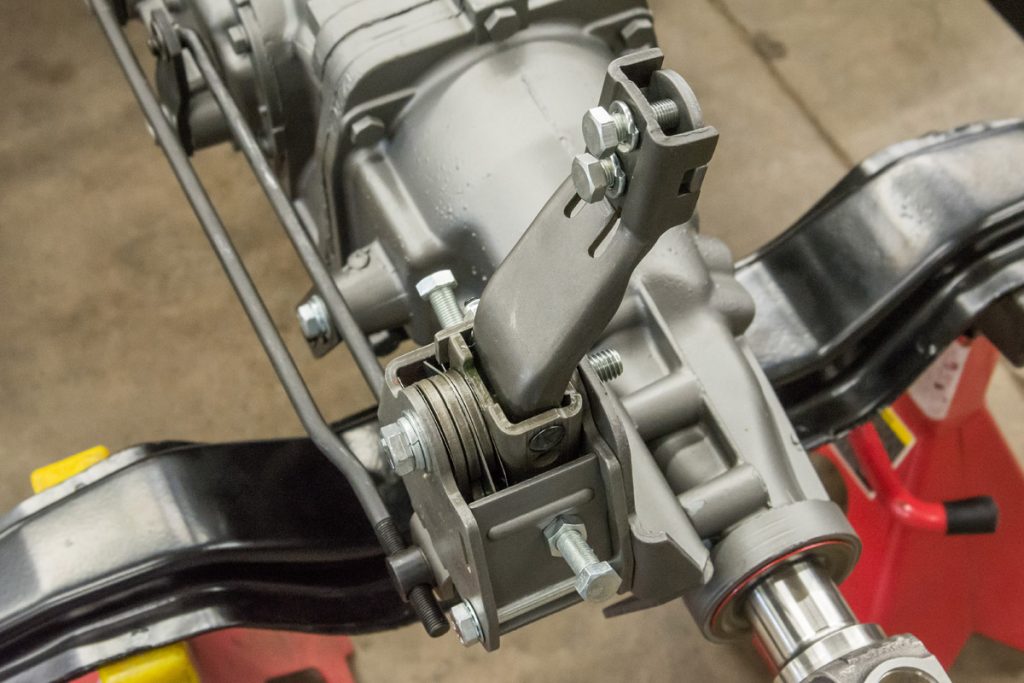
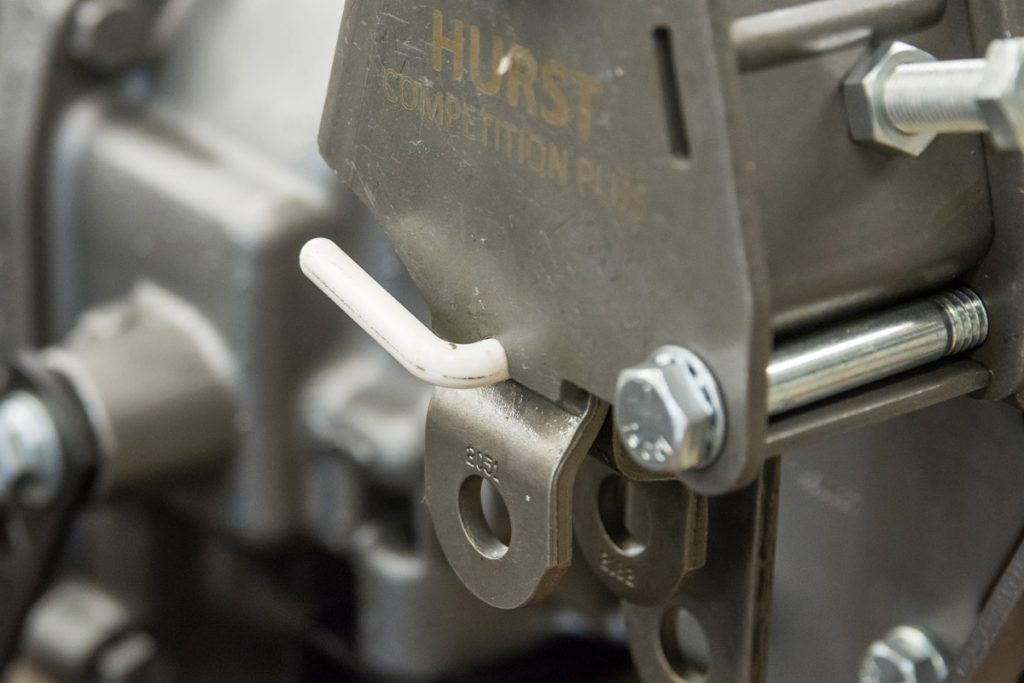
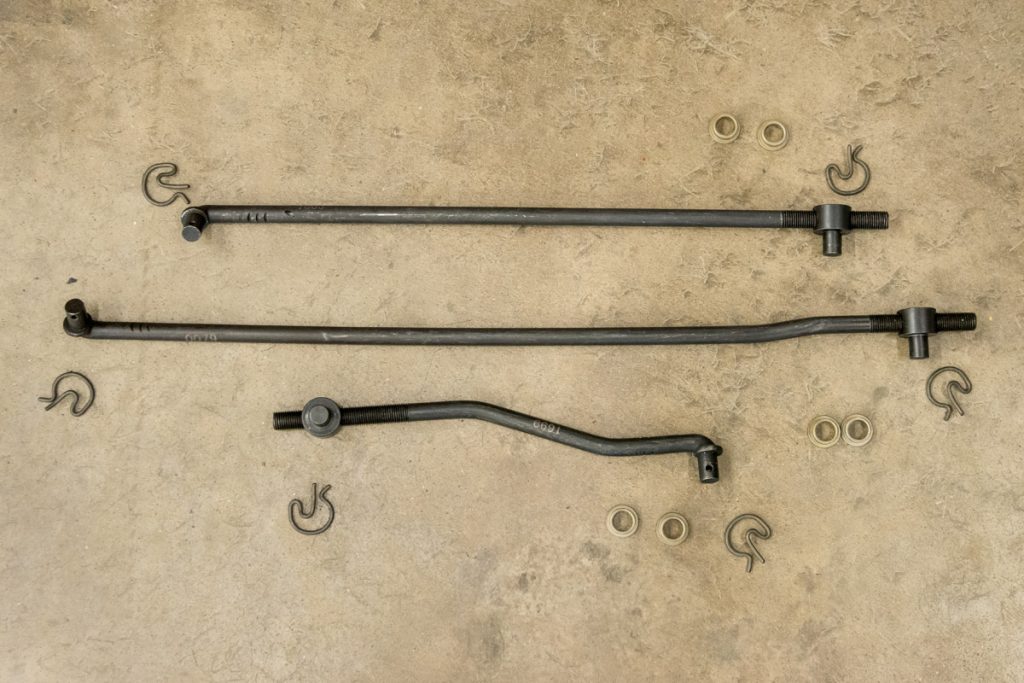
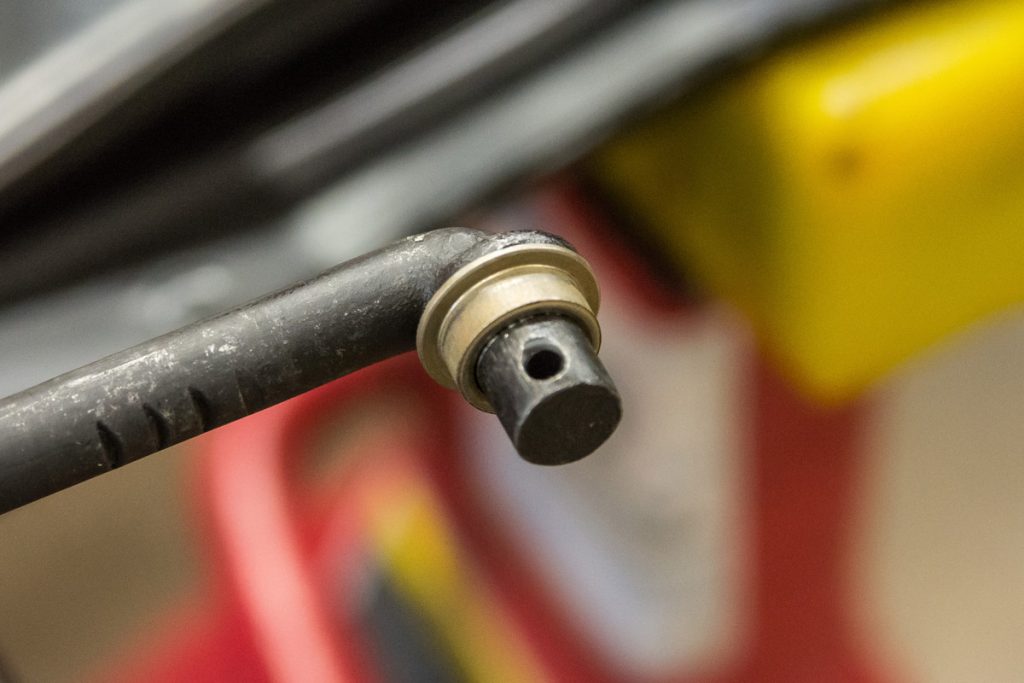
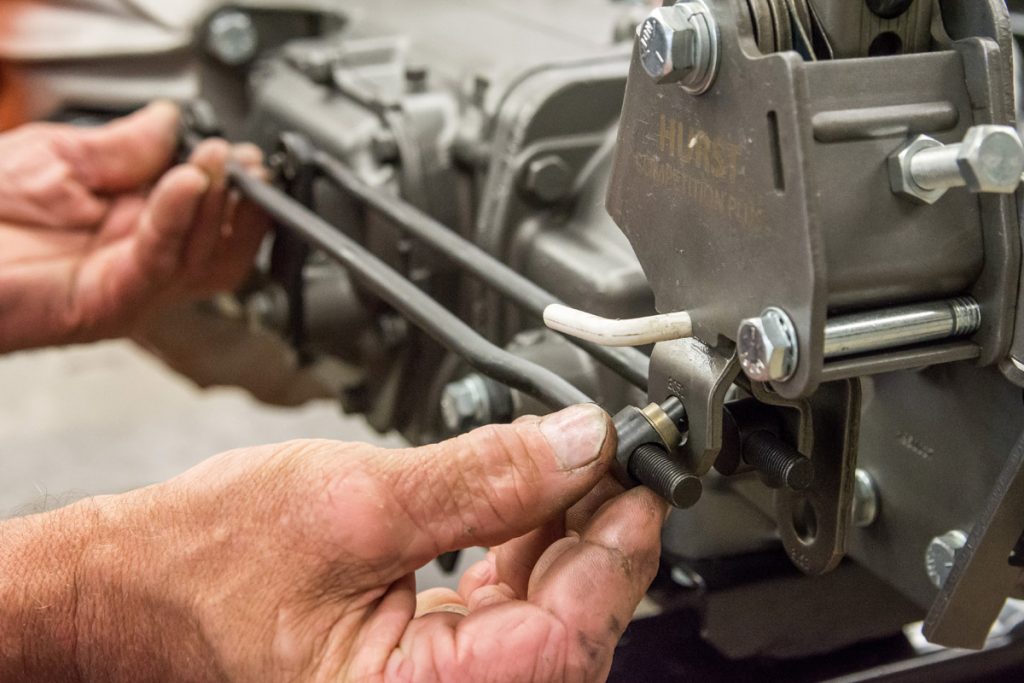
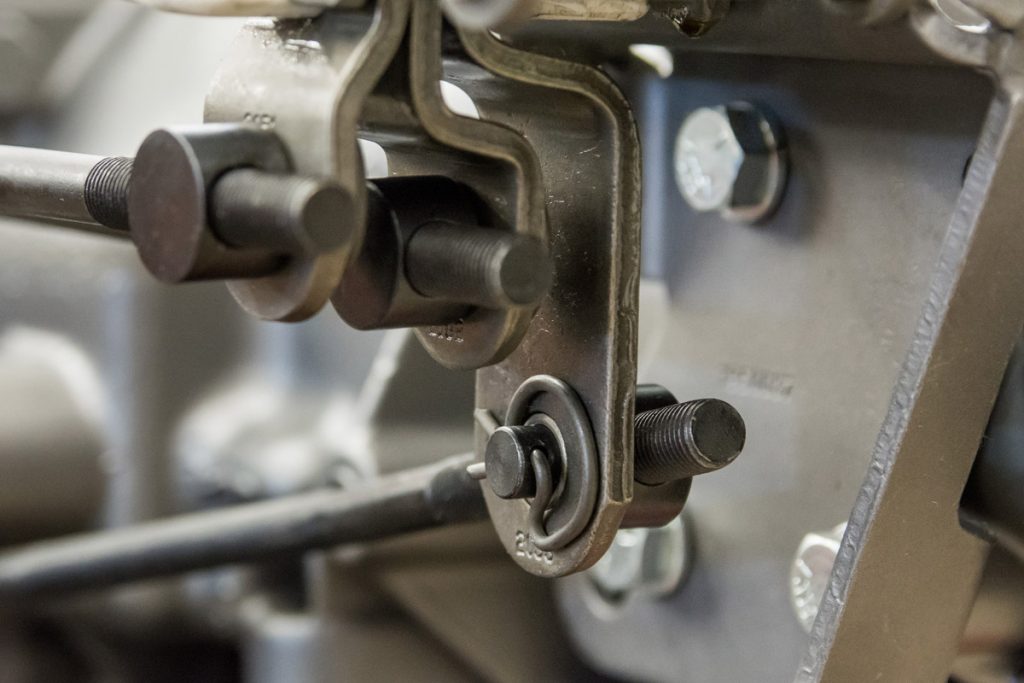
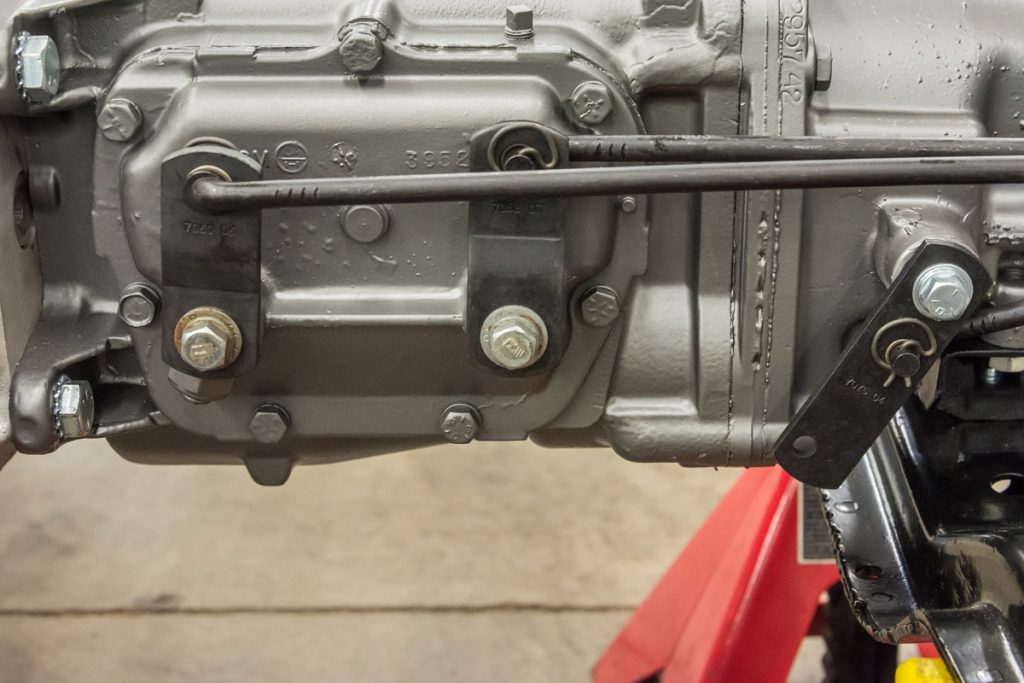
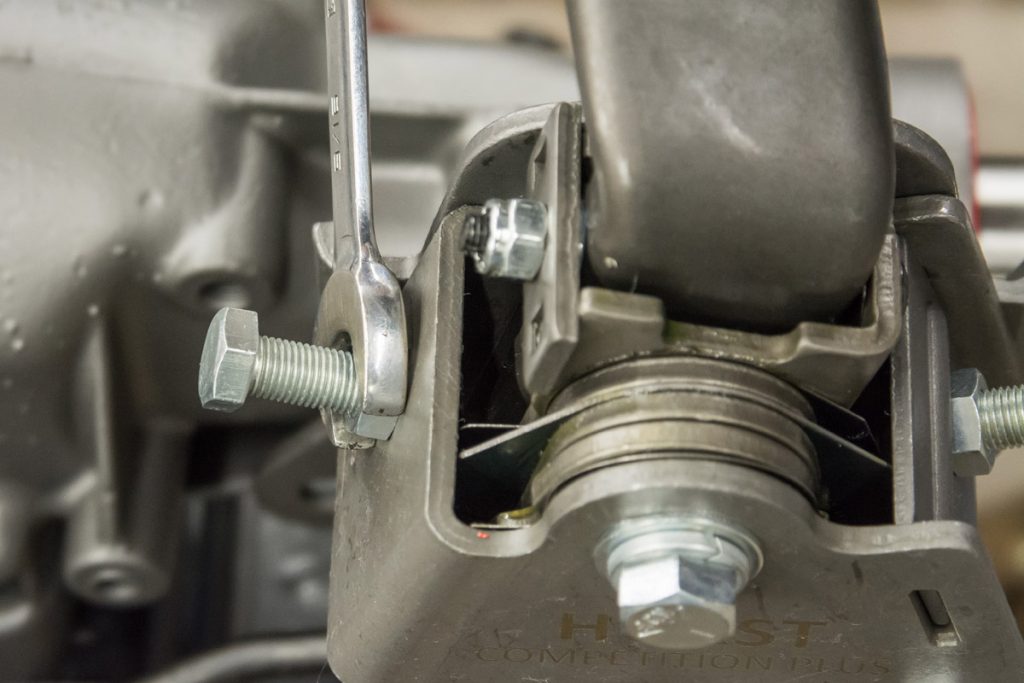
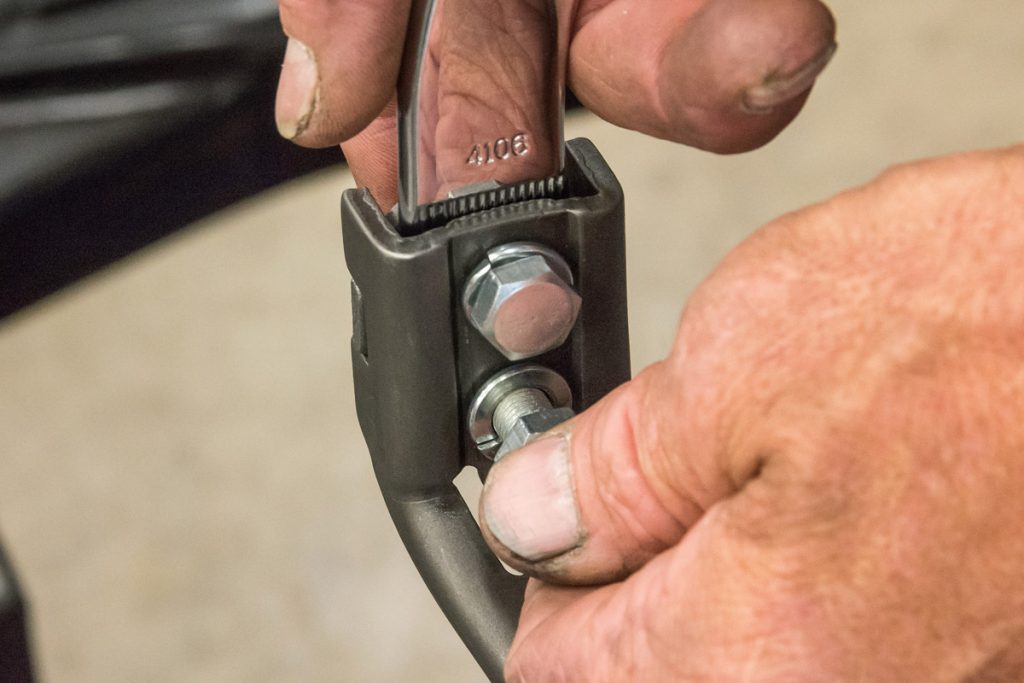
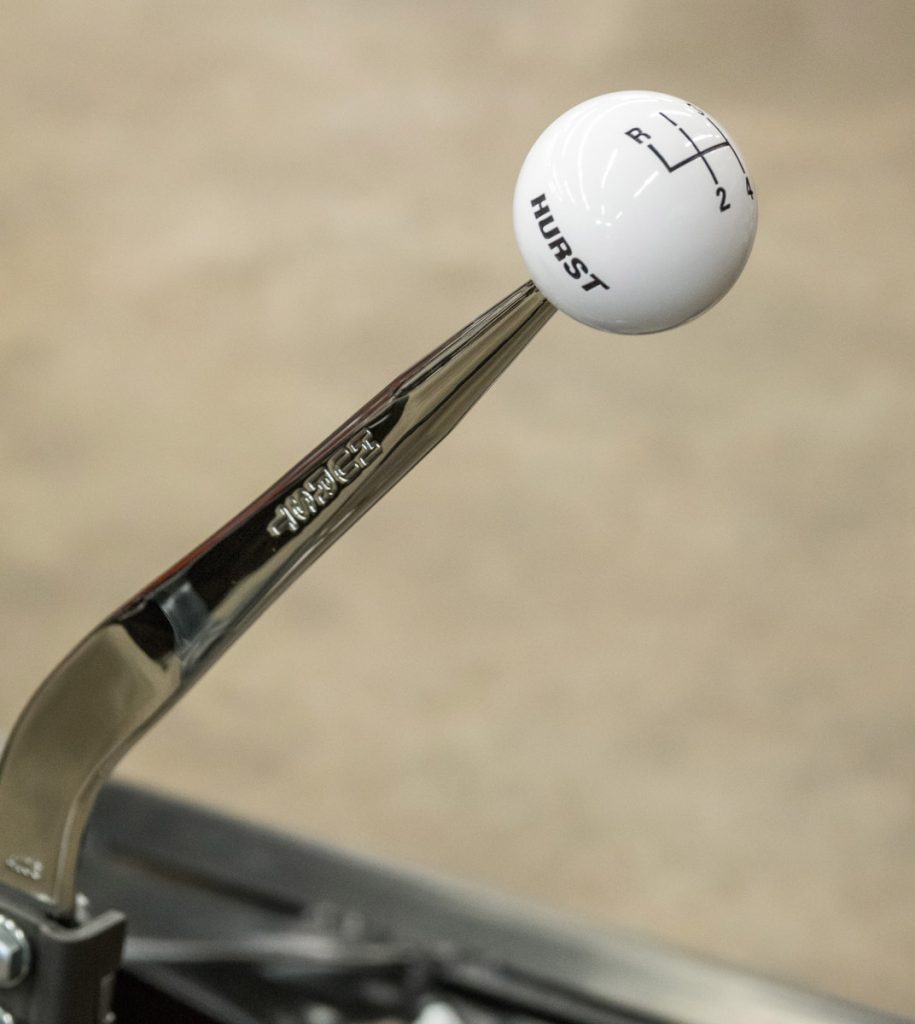
This is a stock Muncie shifter as it came out of a ’67 Camaro. It works fine for normal street driving but can be lacking when it comes to more performance applications.One of the issues with the Muncie shifter is that it mounts to the cross member rather than to the transmission itself. Again, in normal driving situations this is not an issue but under high torque conditions the transmission (along with the engine of course) will twist to the right thus changing the alignment of the shifter rods. This has been known to cause binding leading to poor shifter performance.A Hurst Competition Plus shifter by contrast bolts directly to the tail shaft of the transmission maintaining shifter, shift rods and transmission alignment.After the Competition Plus shifter is mounted on the transmission, the first step to setting it up and getting it properly adjusted is to insert the white neutral alignment rod. This insures that the shifter mechanism is in the neutral position. Confirming that both the transmission’s shift levers are in neutral is also critical.These are the shifter rods that come with the Comp Plus shifter. Note the bronze bushings and the spring clips for each end.MCR installs the bronze bushings (vs. the nylon ones also provided) since they last longer and provide a slightly more positive shifter feel.With the other end of the rod already in the transmission’s shifter arm, adjust the position of the button on the other end so it easily slips in the shifter arm.The provided spring clips positively hold the shift rods in place and yet are easy to remove form under the car if needed.On the transmission, the shift rods are staggered to provide proper clearance.Stop bolts are supplied for 3rd and 4th gear to prevent damage to the trans from over shifting. The process is simple. Put the shifter into 3rd gear and hold it there then turn the bolt until contact is made and then back it out one turn and tighten the lock nut. Do the same for 4th gear.The last step is to install the shift lever. Note the groves on the end of the handle. They interlock with the ones on the shifter to guarantee the handle stays put.Finish off the handle with either the classic white Hurst shifter ball or maybe the Hurst T-handle and you’re ready to go cruising.