Salvaging rare original Chrysler quarters for this museum quality resto.
The word “restore” has a lot of different meanings for different people. In the context of restoring classic muscle cars, restore can range from something as simple as basic rust repair and new paint up to what used to be known as a “frame off” restoration.
But there is another level to restoration beyond “returning to like new in appearance and function”. By this definition, collision repair could be considered a form of restoration. Back when these cars were all over the roadways, collision repair was the norm and it served the purpose in quickly getting the cars back on the road. Remember that back when they were new, what we consider classic muscle cars were more than likely just daily drivers or “grocery getters”. Relatively few had any real “muscle” and none of them had any historical significance.
All that of course has changed. While performance versions are more desirable than base models they are all highly collectible today and have been for some time. So much so that it’s becoming very difficult to find an original car that has not already been “restored” at least once and sometimes more.
Muscle Car Restorations sees this quite often. An owner brings in a car that they want restored and a significant part of MCR’s work on the car involves undoing a lot of the previous restoration work in order to make the car factory correct again. The previous work isn’t always “bad” and may be perfectly functional it’s just that it’s not “right”.
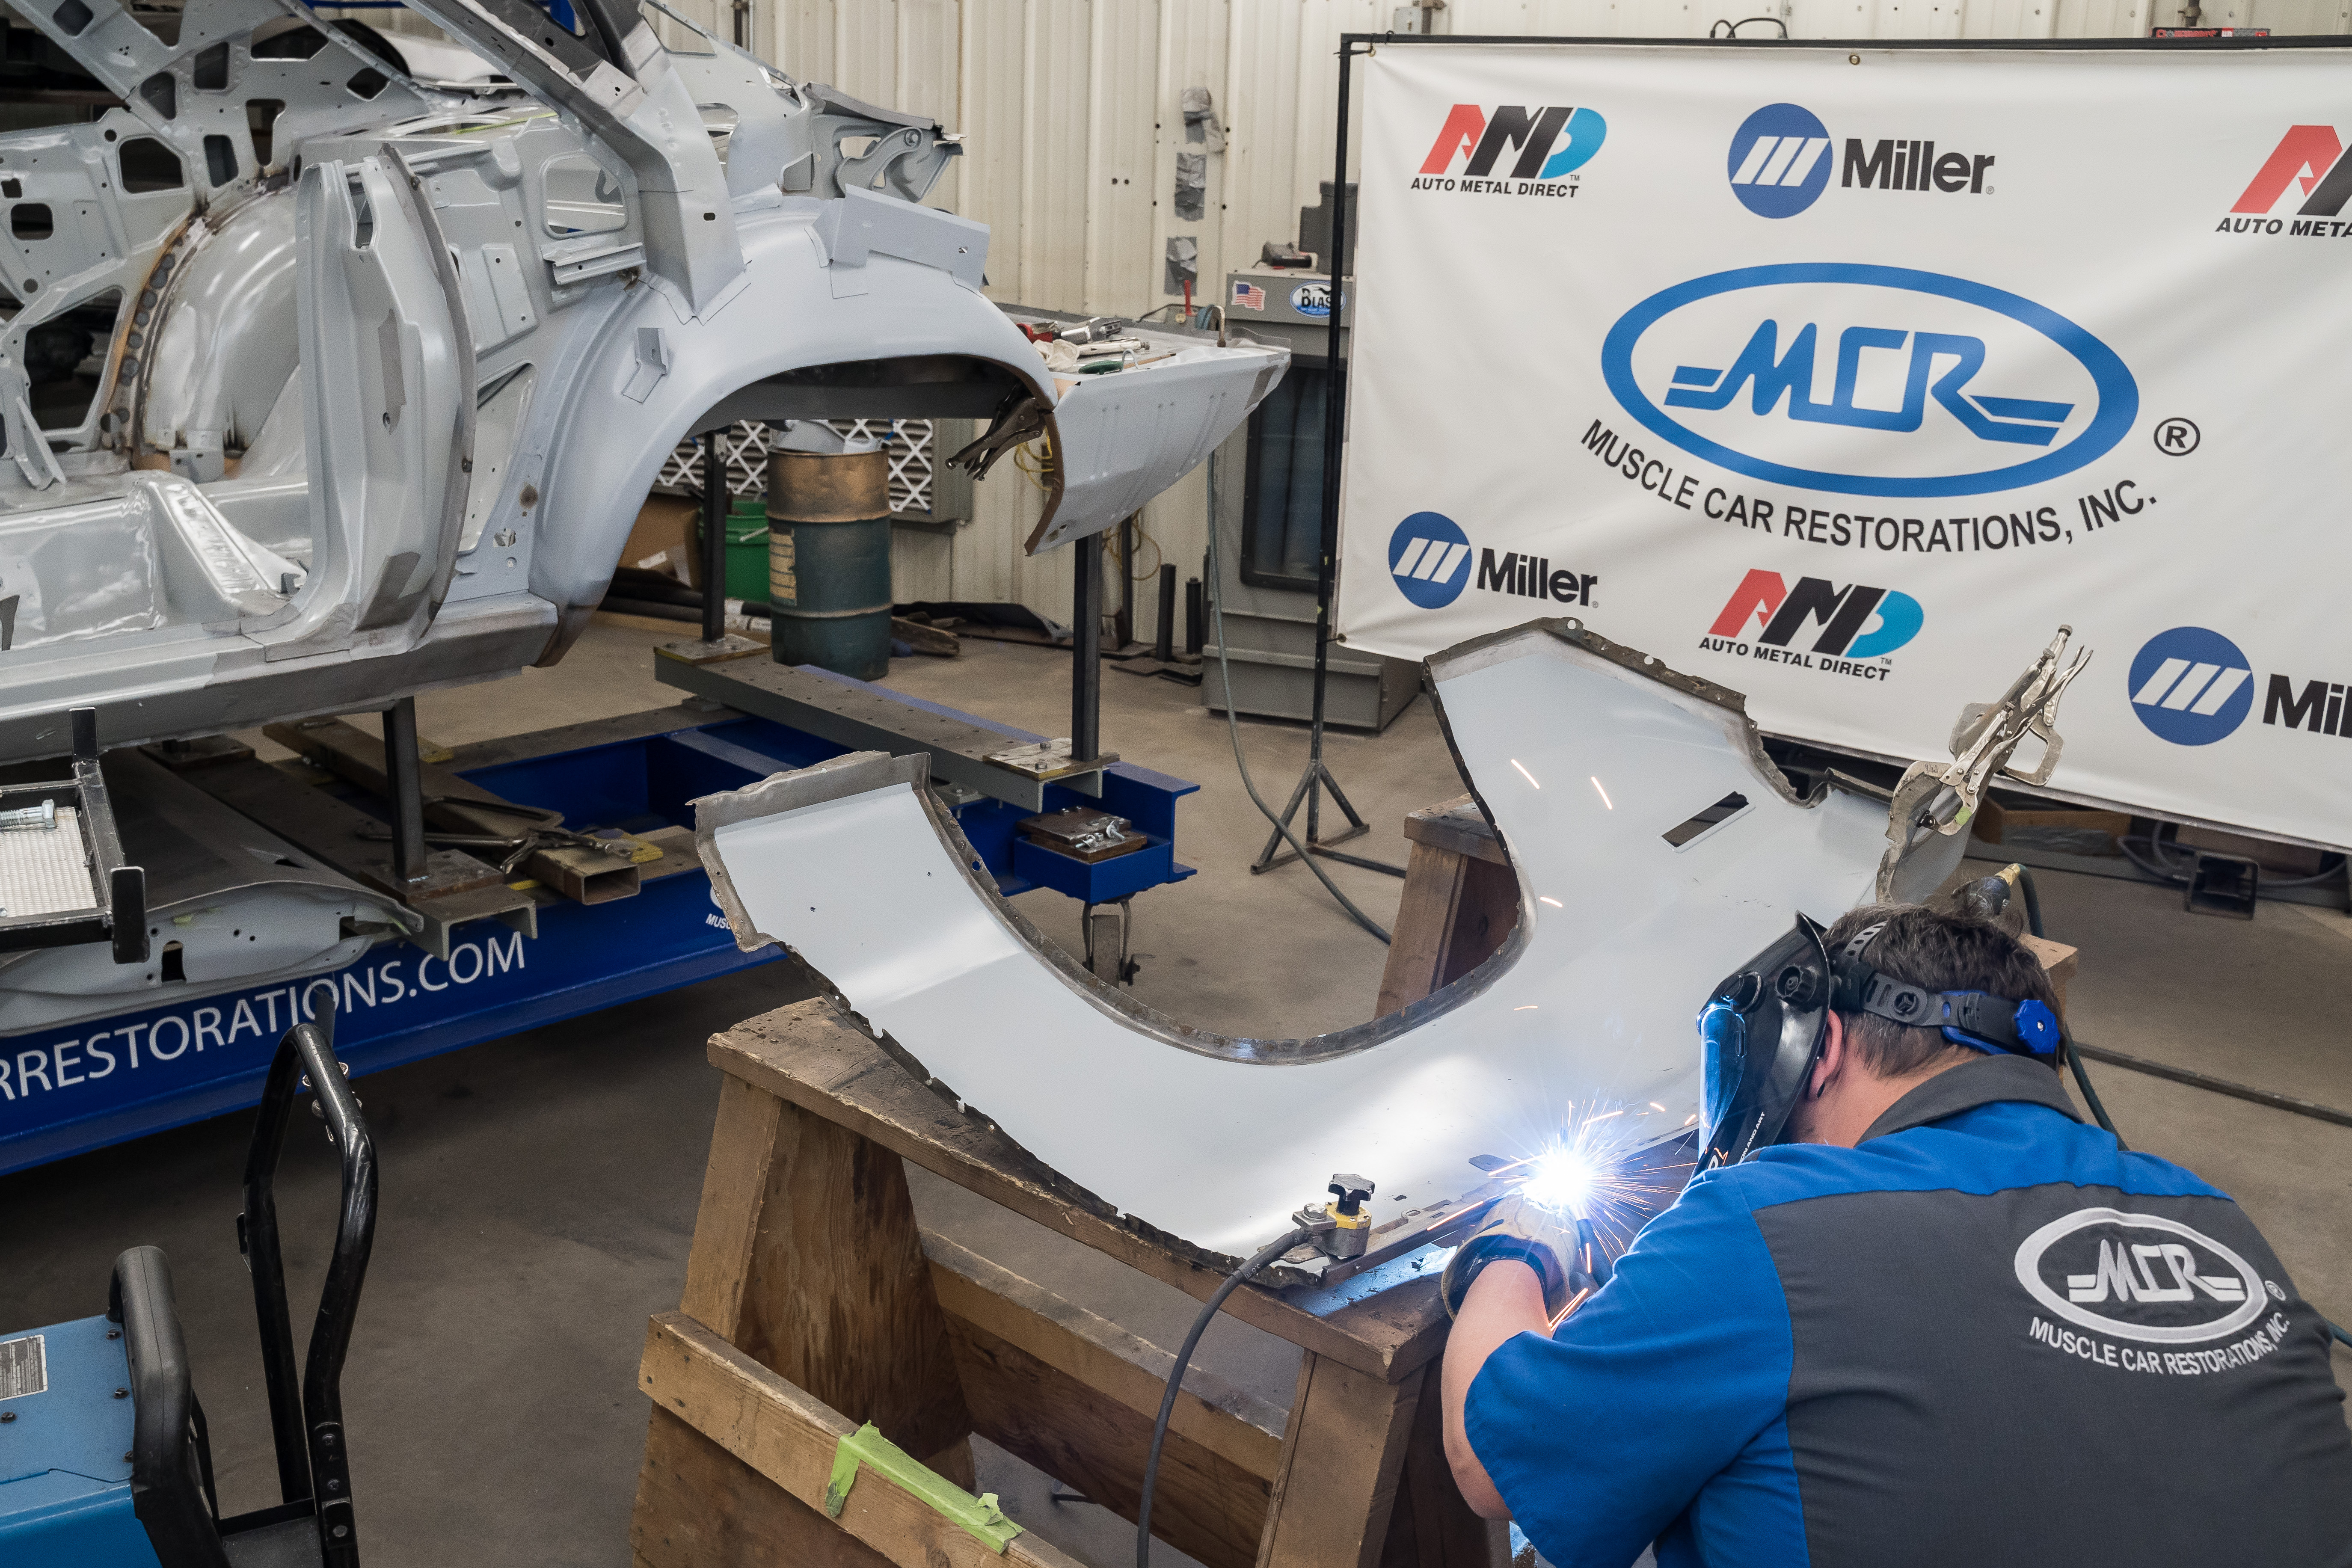
That was the case with this particular ’71 Hemi Cuda 4-speed. With only 59 of these produced, it certainly falls into the historically significant class which makes having it restored “right” all the much more important. However it came to MCR as a basket case. The previous shop got it taken down to a bare shell with the quarters and most of the back half removed. It came with a number of supposedly original used factory parts but MCR found that some could not have come from this car and were not useable.
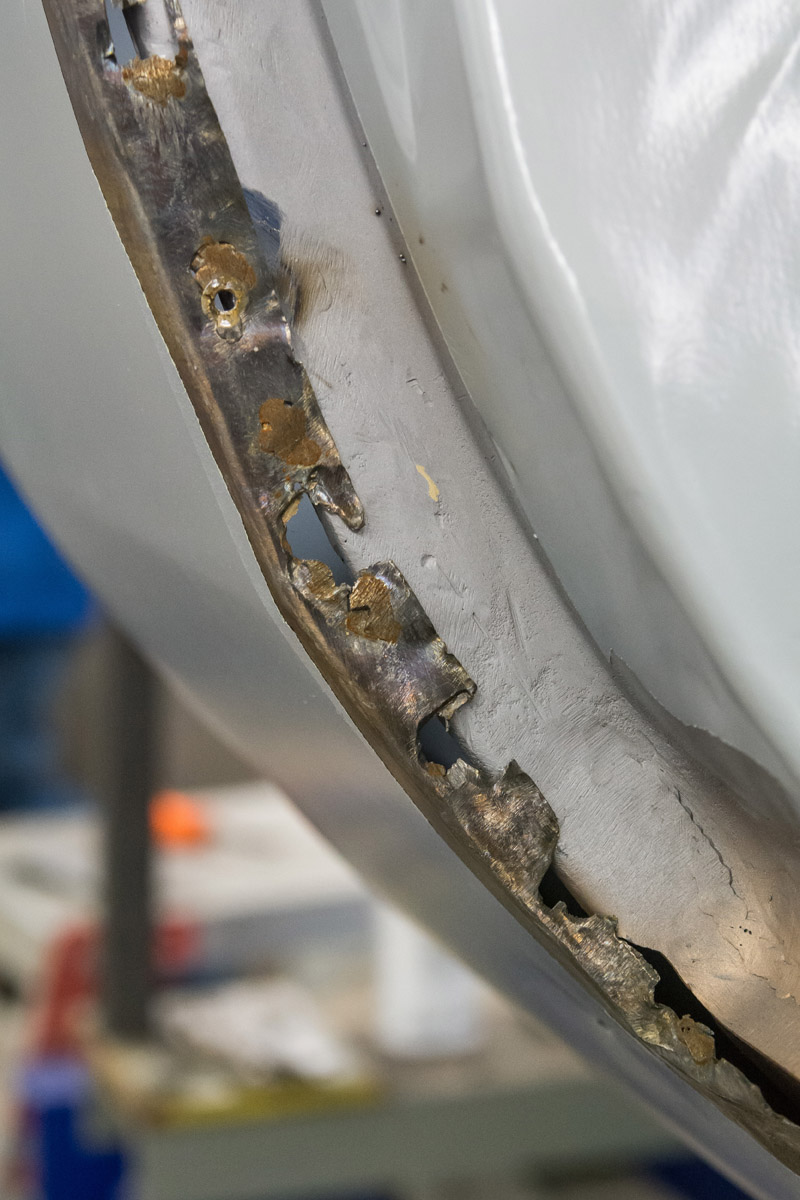
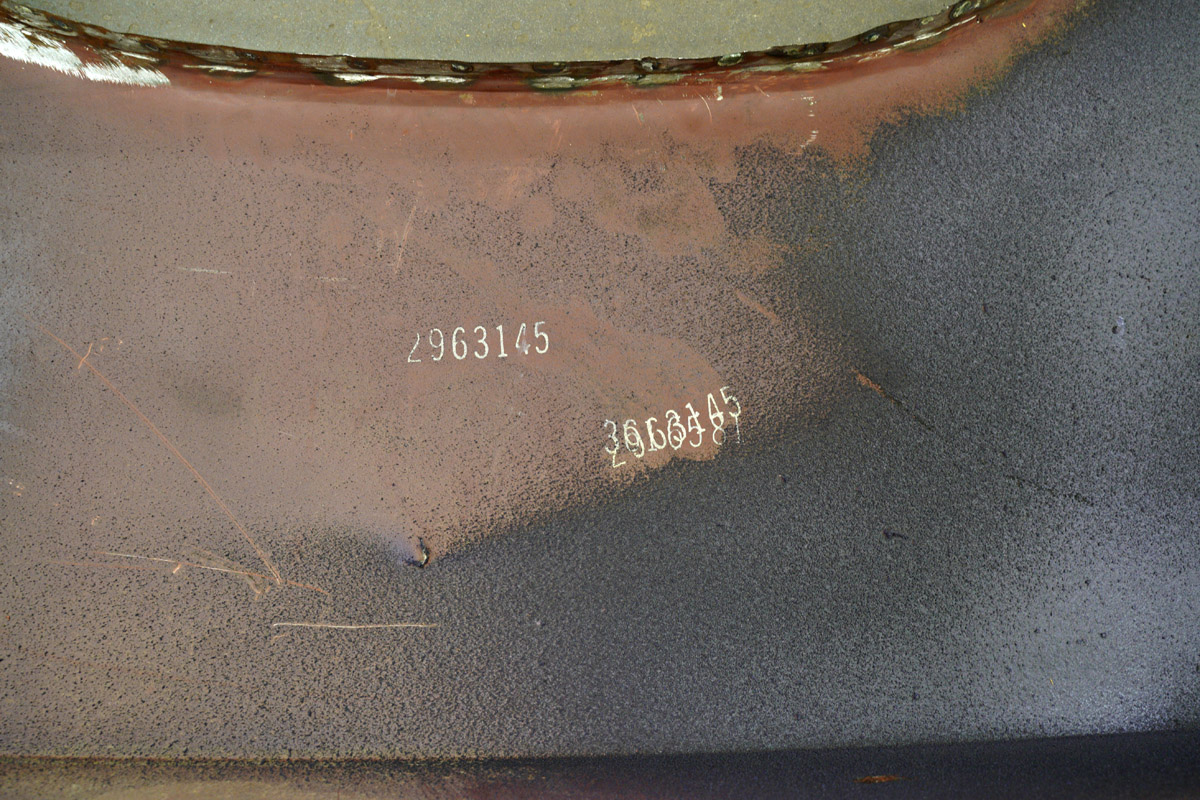
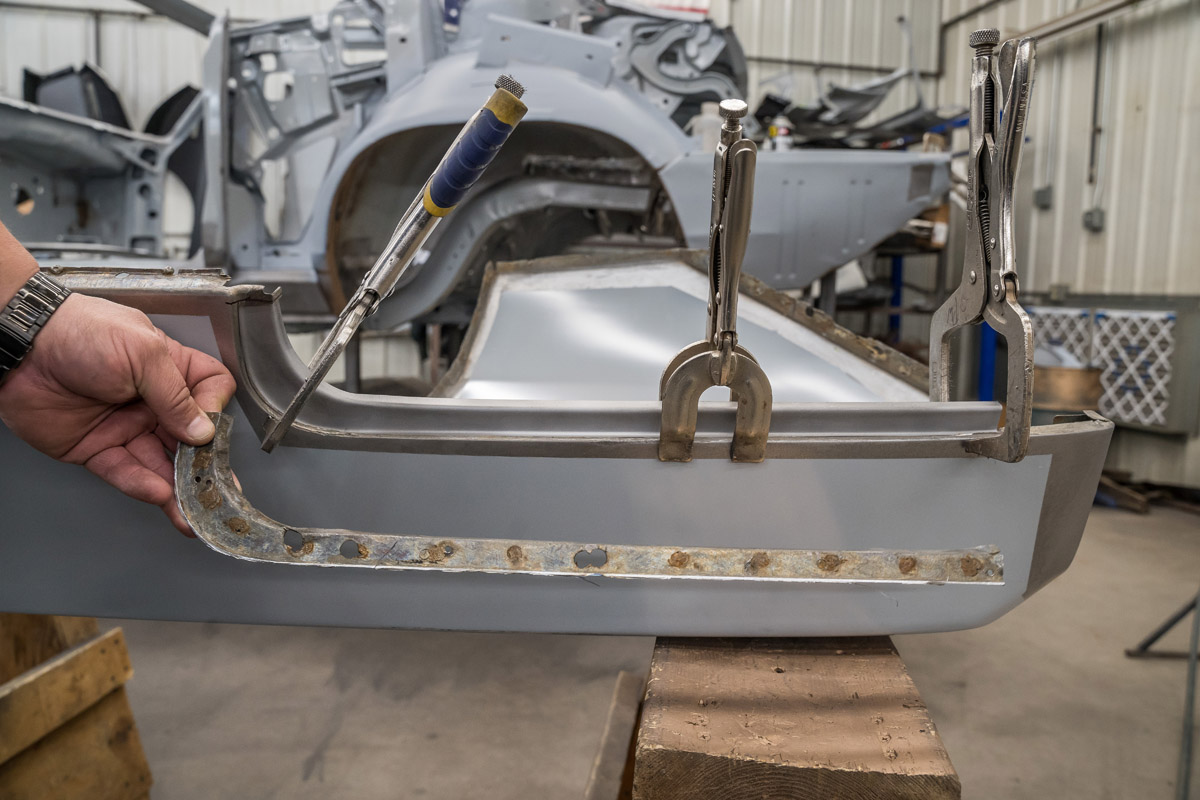
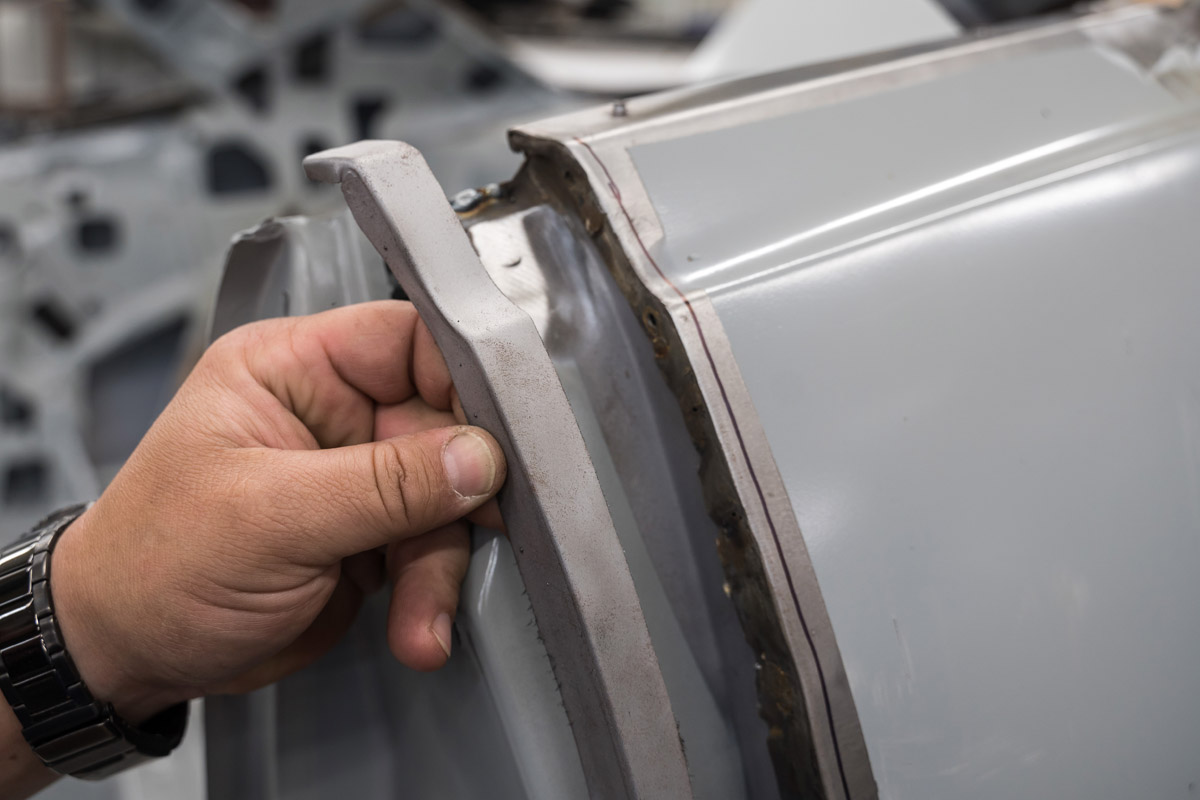
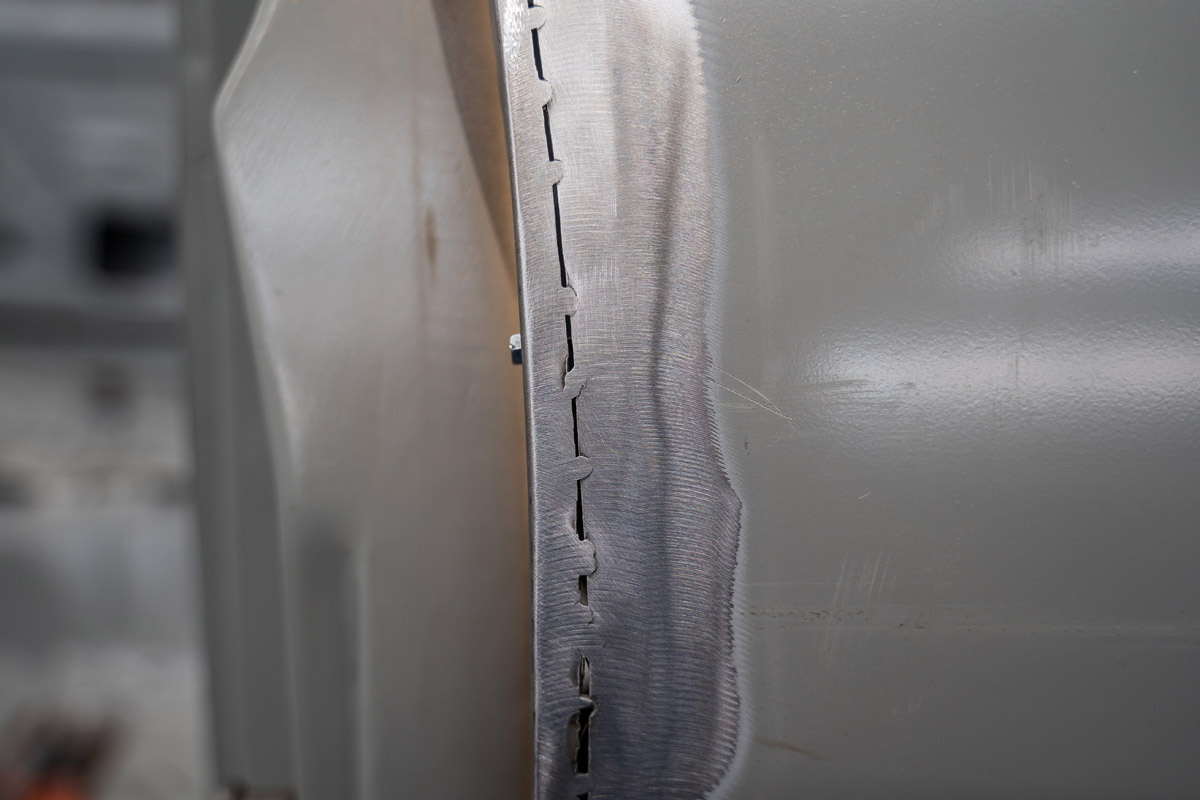
Parts that did get MCR’s attention though were both of the quarters. They had Chrysler part numbers stamped on the inside which would seem to indicate that they were original Chrysler repair panels from back in the day. Problem was that they had already been installed on a car (probably not this one) at some point and the work was in the classic collision repair style, i.e. bad plug welds etc. Whoever removed them from whatever car left the edges in pretty bad shape but otherwise they were in excellent condition.
The current owner desired a museum quality restoration and these original Chrysler panels fit that need but they were unusable as they were with all the attachment points suffering from distorted edges, burn throughs and otherwise being mangled out of shape.
While it would be possible to rebuild all of those edges from scratch, MCR concluded that a more correct solution would be to use AMD panels as donors for the needed areas. They normally would have just installed full AMD quarters as they have found them to extremely correct when it comes to overall fit but given that “correct” Chrysler panels were available, it was decided to use AMD parts to repair the originals. This would make them indistinguishable from original parts and satisfy the museum quality requirement.
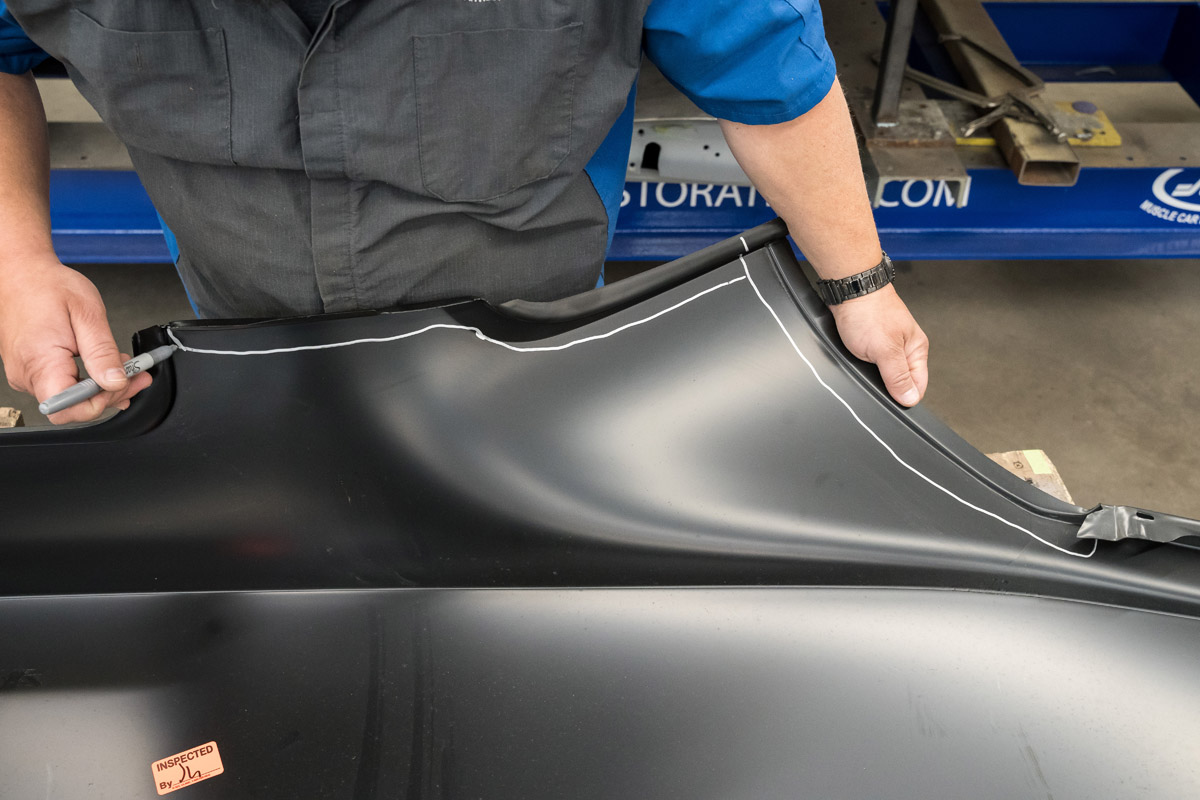
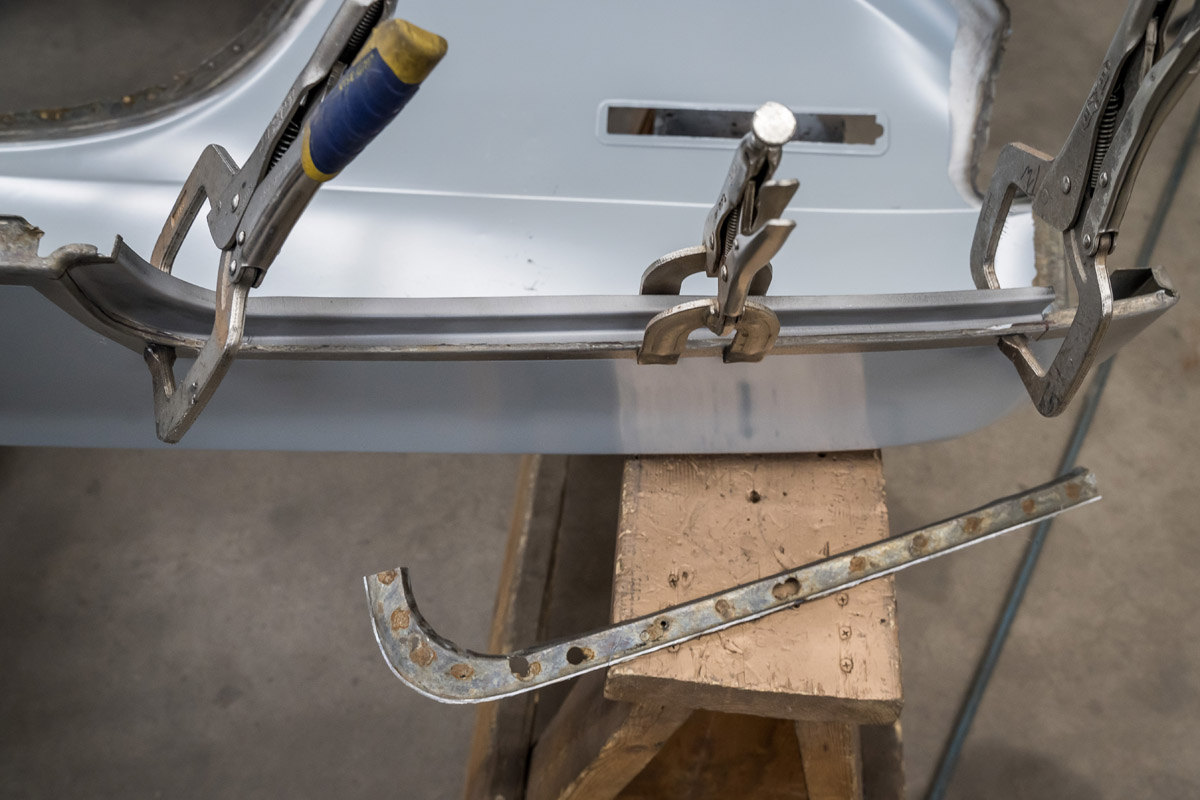
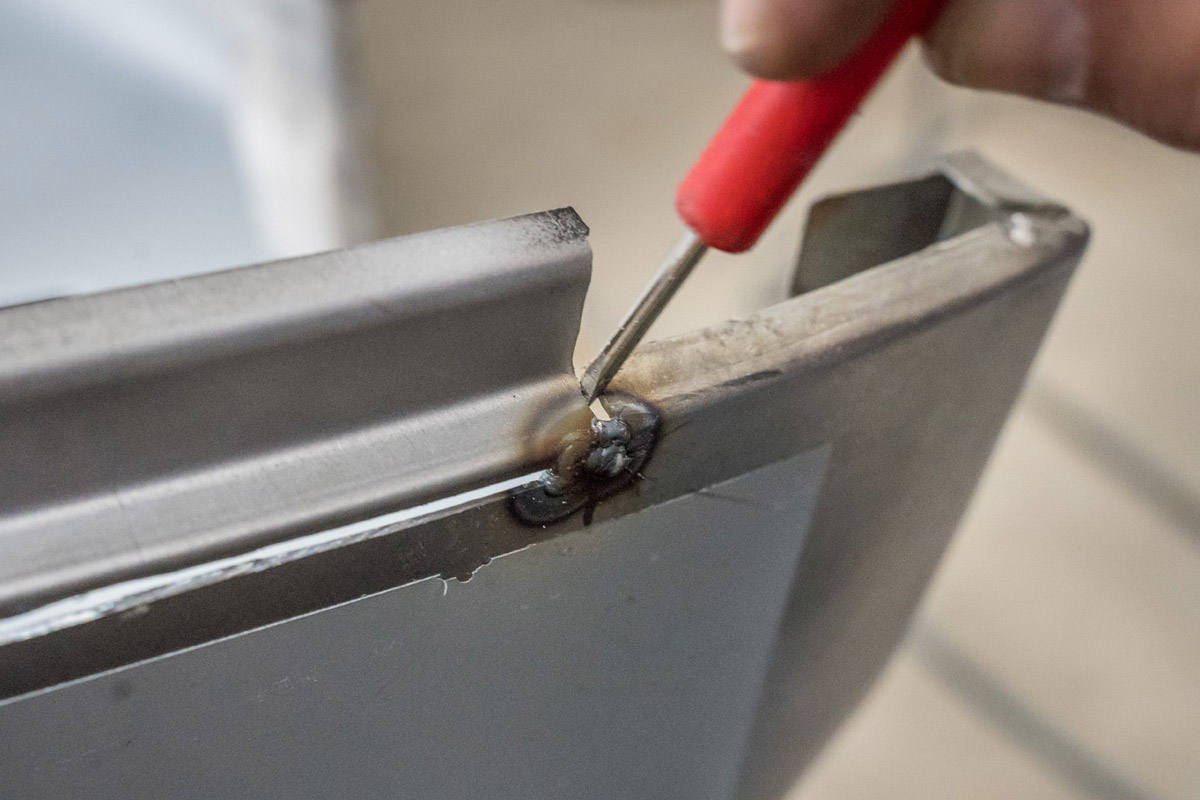
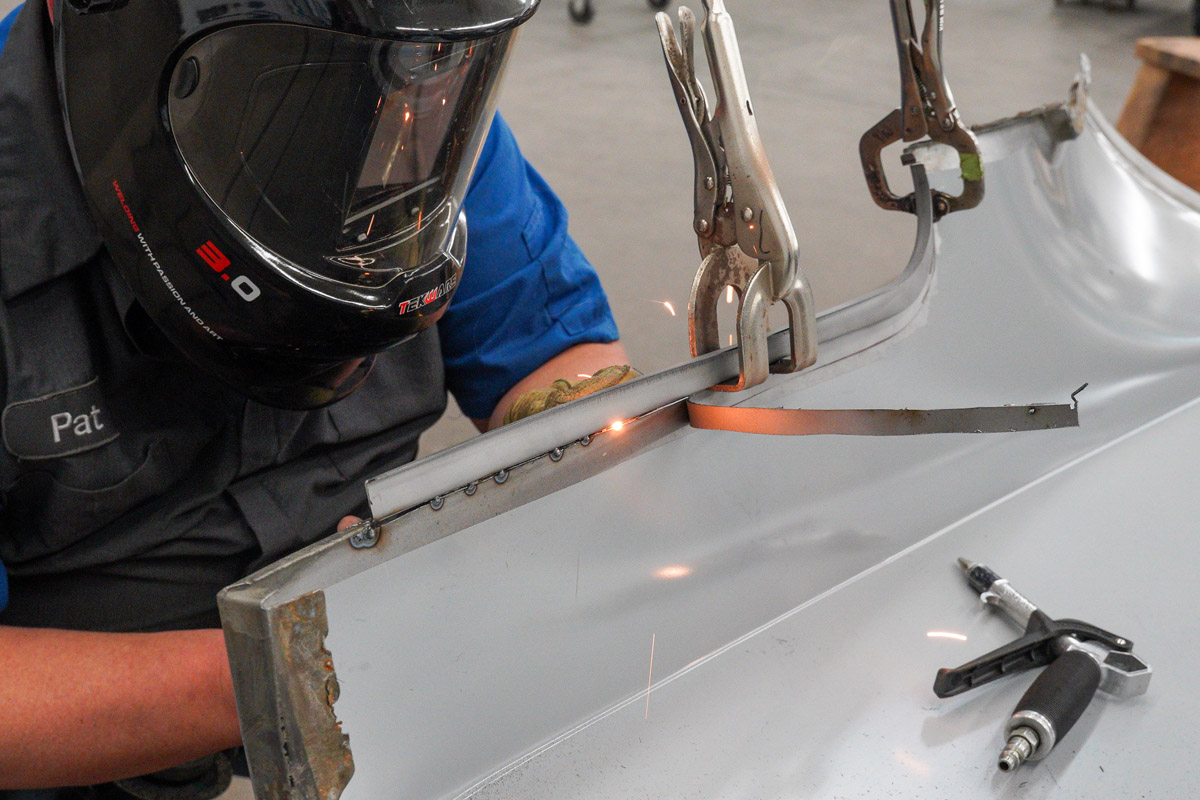
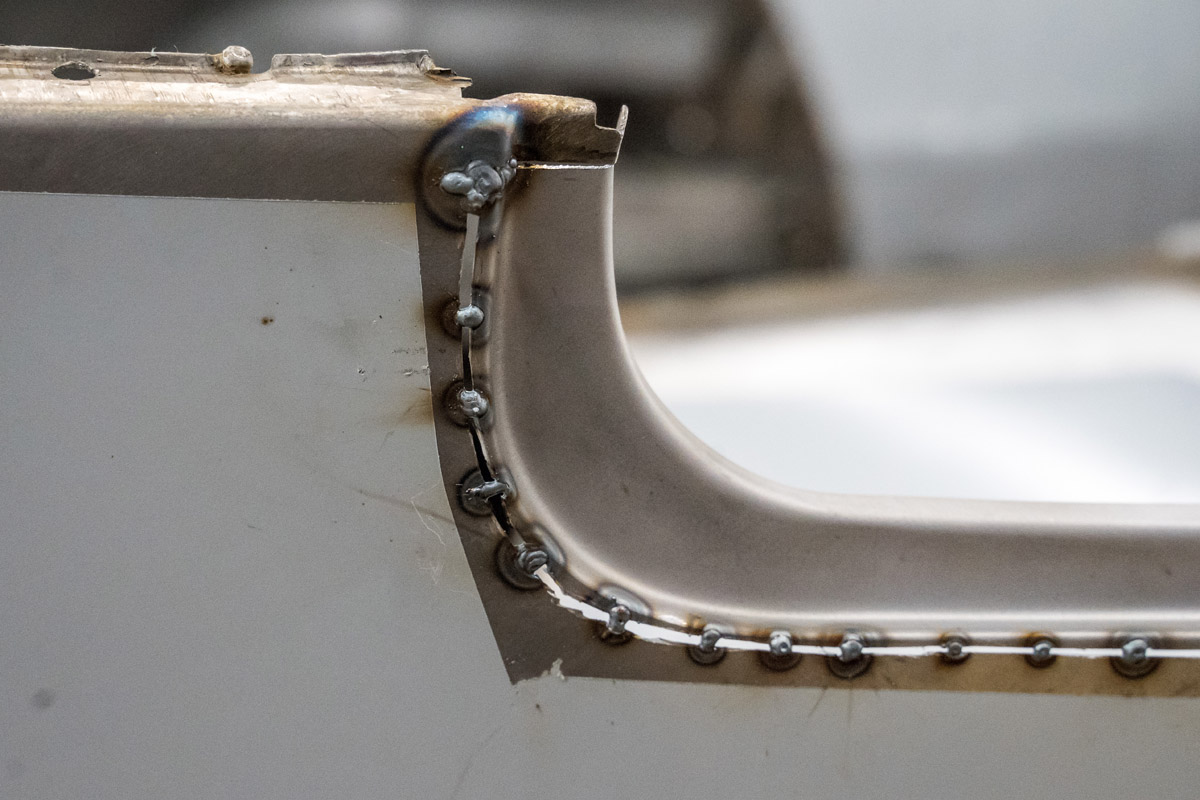
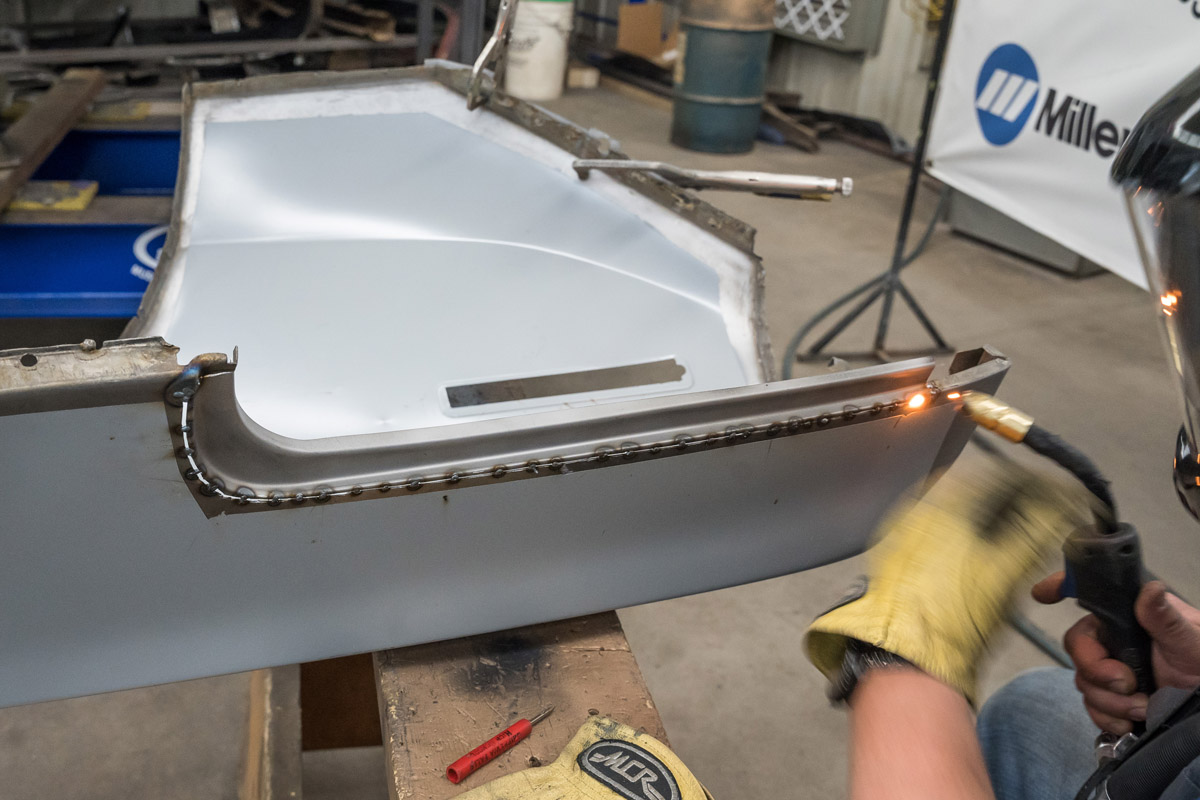
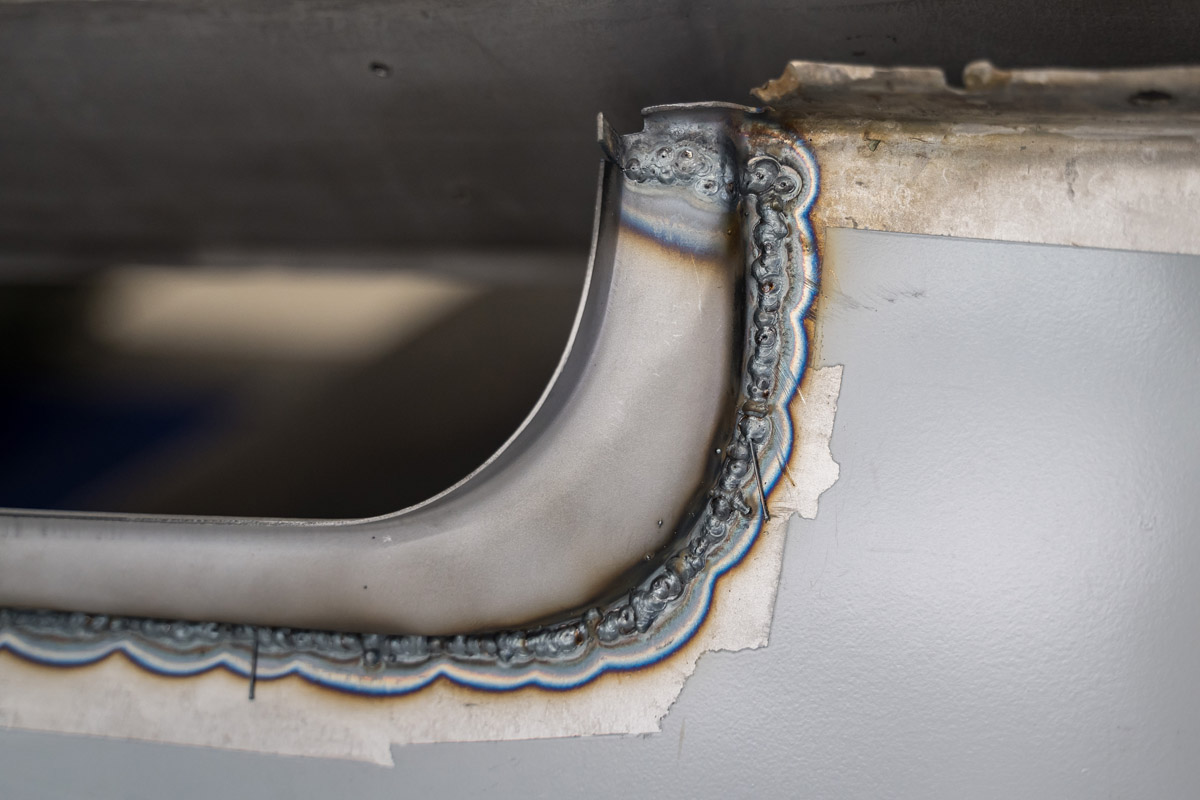
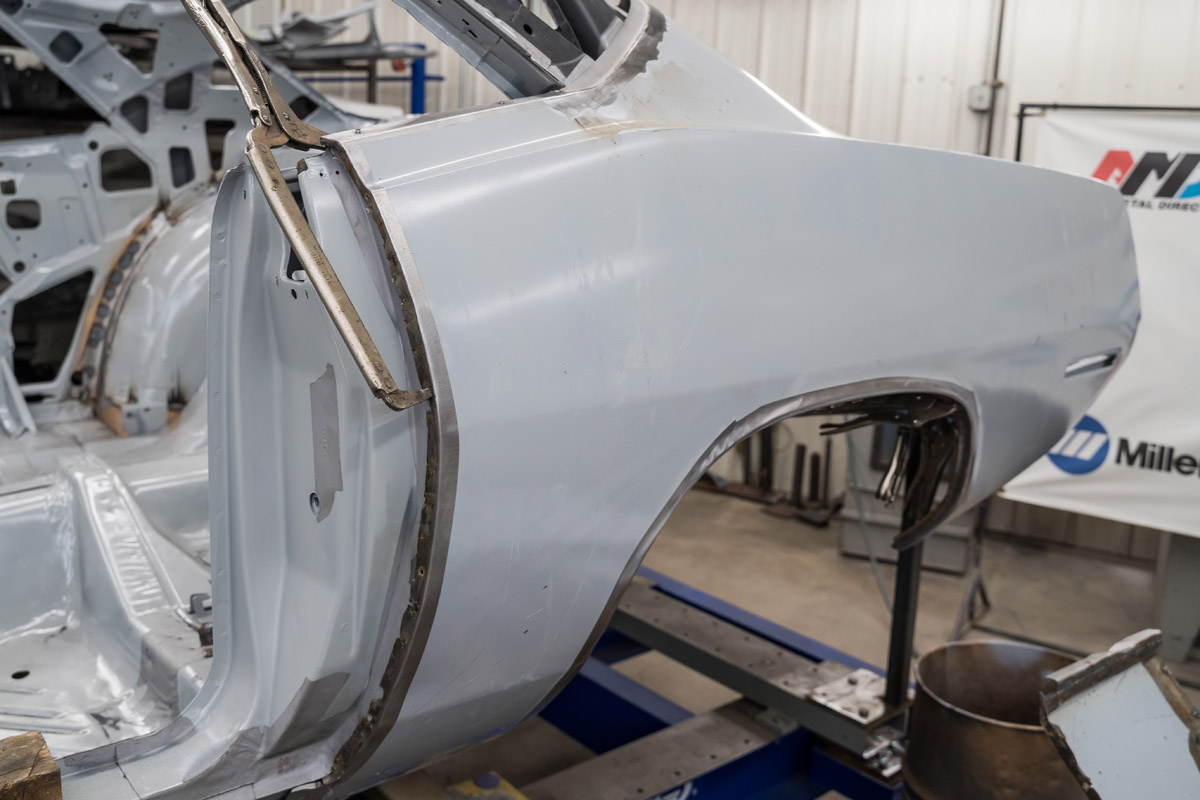
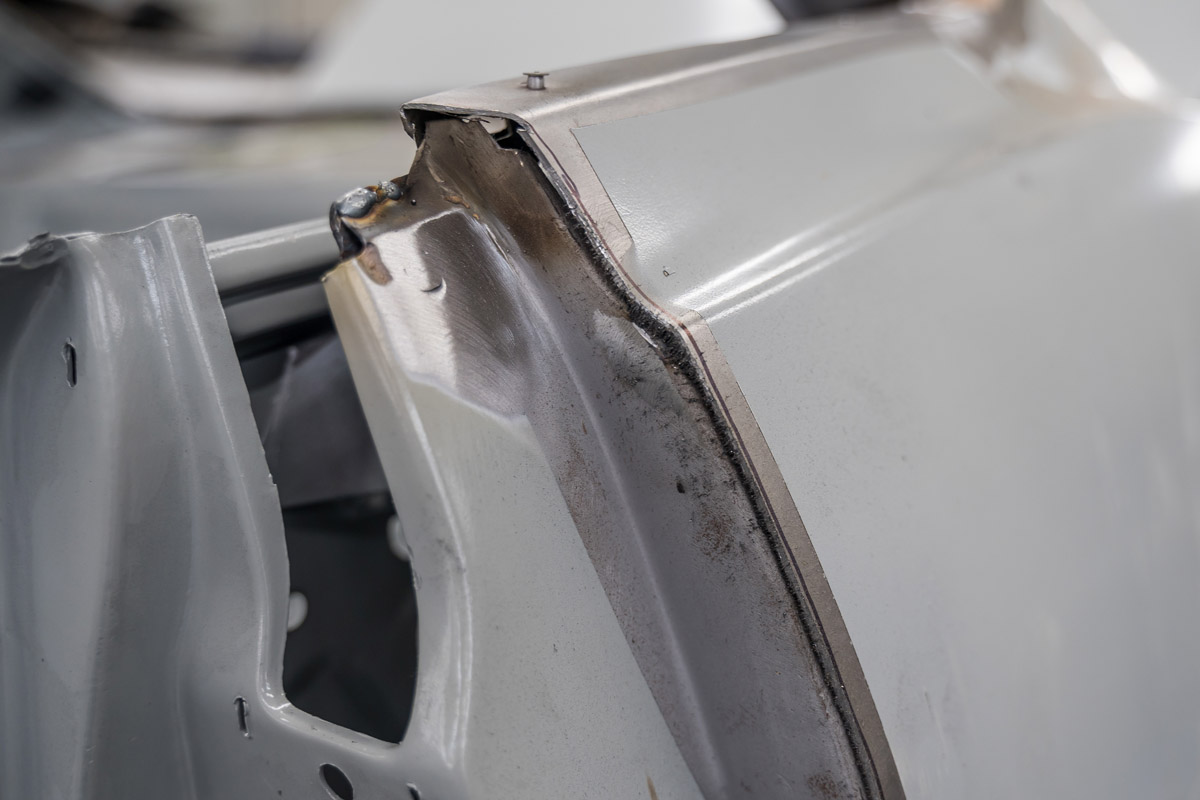
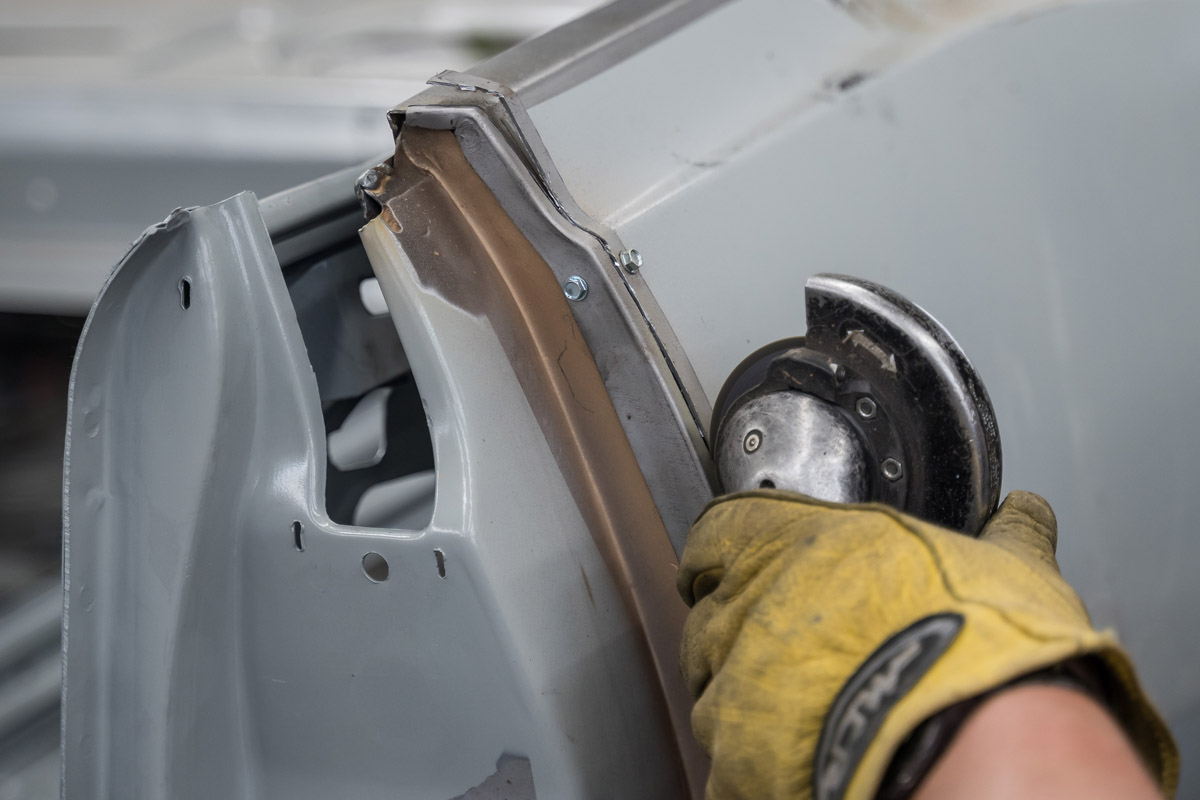
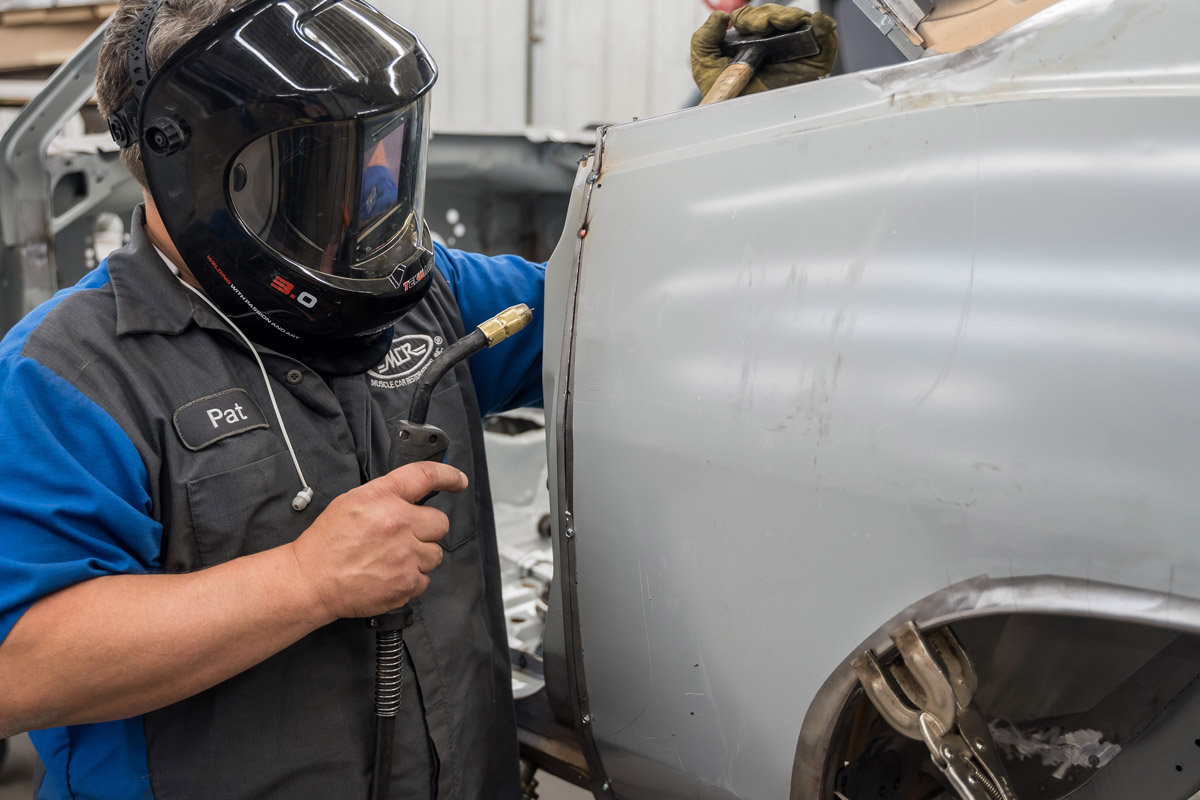
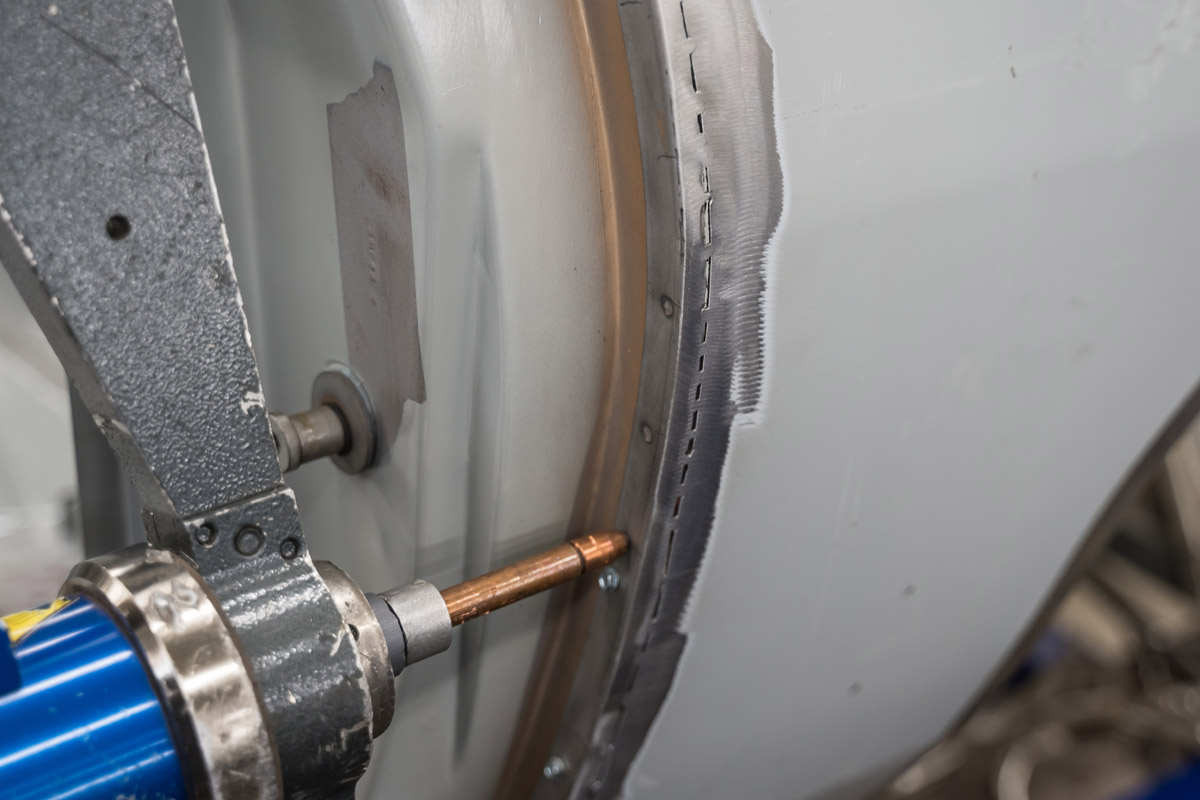
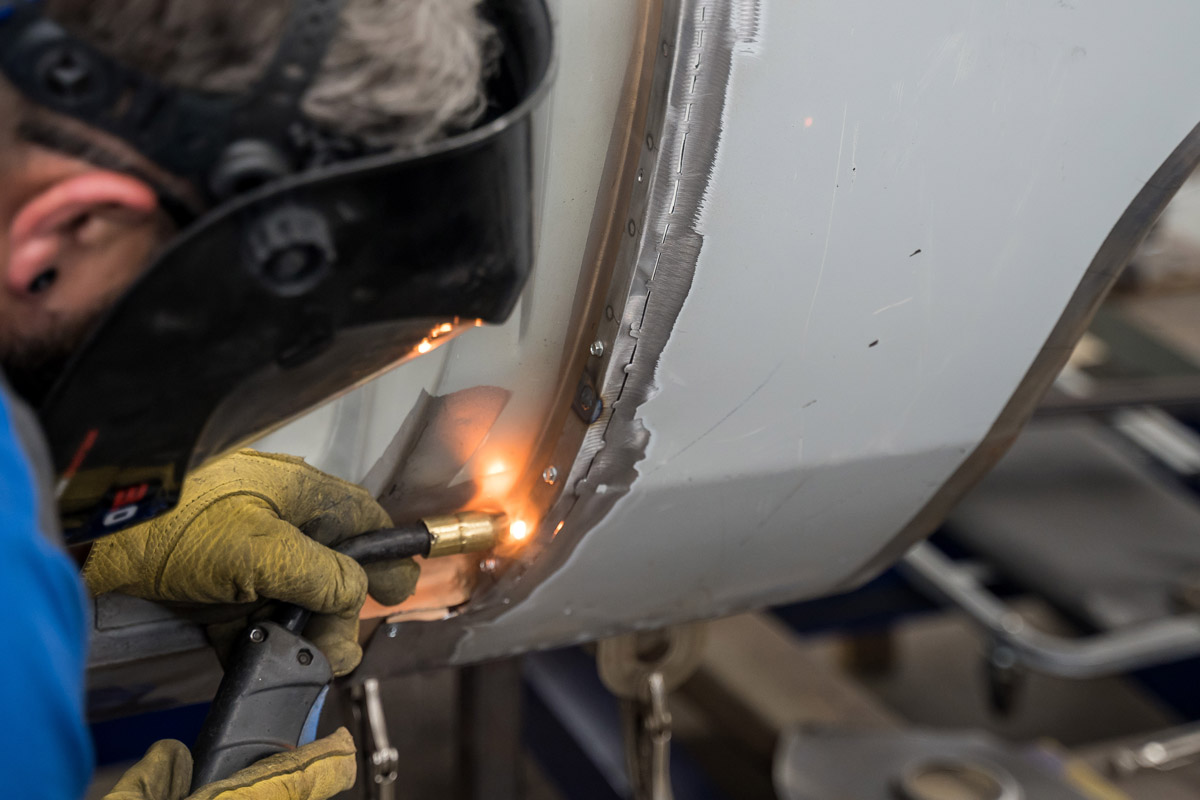
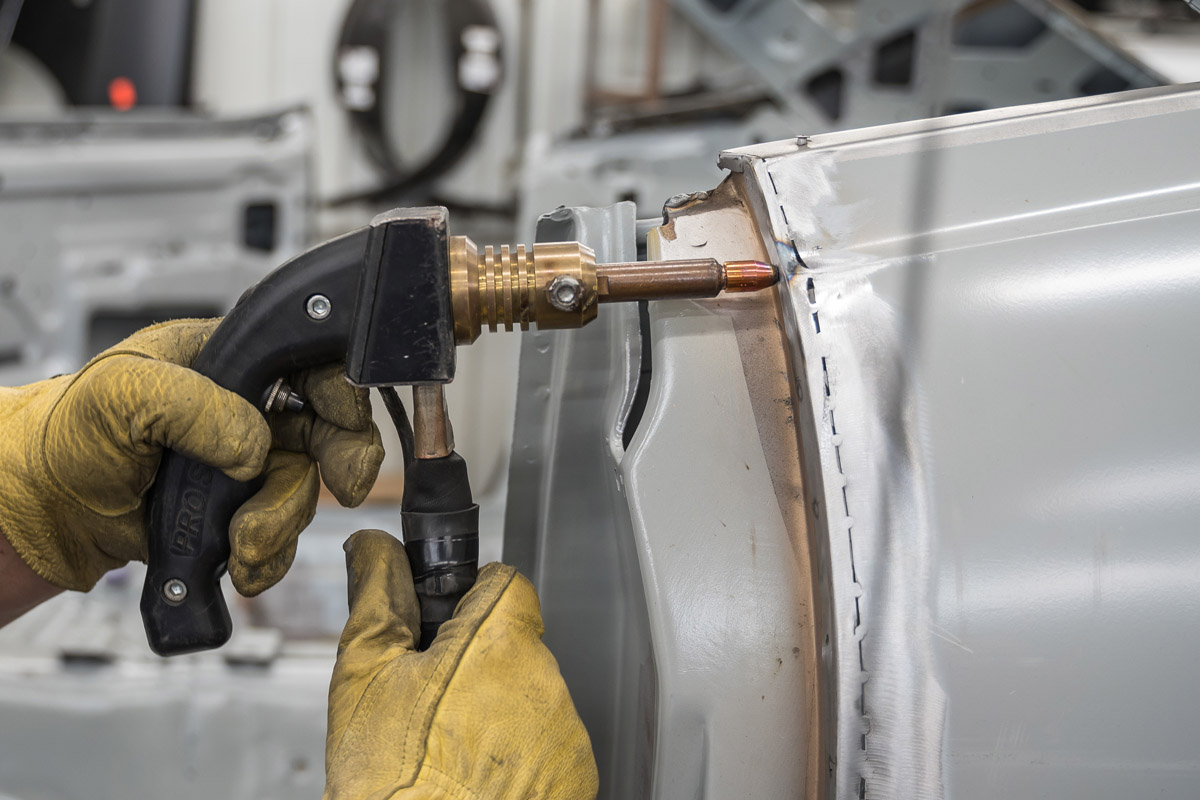
Clearly this quarter has been on and off of another car, perhaps this one, but now there is no way that this edge can be reused and spot welded onto a museum quality resto – yet the quarter itself must be saved.These stampings are what identify this as a genuine Chrysler quarter which is what makes it worth saving and using on this car.By using AMD panels as donors for the mangled edges of the NOS panels, all of the subtleties of the originals can be maintained yielding an as factory installed quarter. MCR clearly outlines the cut line in advance to insure the cuts don’t go off course.A little more that what is actually needed is removed from the new panel to provide some overlap.Obviously the new edges were replaced in sections to make the project more manageable. This shot again shows just how messed up the edges of this quarter were. Properly locating the parts is fairly straightforward. A small amount of overlap allows a cutoff wheel to cut through both parts leaving the perfect sized gap for butt welding the two parts together.The butt welding is accomplished but using a series of quick tack welds while insuring that both parts are in perfect alignment. Tack welds are initially placed about every inch or so with just a quick touch of the welder followed by an air quench so as to eliminate any possibility of heat warping.Notice how small the heat rings are around each weld. The quick welds don’t result in anything being pulled out of place.Once the first set of tack welds are complete, typically another set will be placed between each of those followed by a set of three or four quick tacks in a row to close the gaps. All are followed by an air quench.The final welds will be ground smooth on both sides so that the repair becomes all but invisible. One edge that’s treated differently is the leading edge that forms the door gap. Since this edge/corner will be replaced, MCR will wait on this one until the door is installed. Again, a cut line is drawn on the quarter where the bad edge will be removed. Note that the new section is a bit wider than needed to provide some overlap on the quarter. This will allow plenty of room for the door gap to be adjusted. The bad section needs to be removed first to give room for the new section to be adjusted to the door.As the new section is fitted, it is screwed in place so it stays put while being welded.Once again, cutting through both parts yields the perfect gap for tack welding the two together.The entire seam is not cut all at once. Rather tack welds are added as the cut progresses while the remaining screws continue to insure that the rest of the new part stays put.This is the first pass of tack welds that have been partially cleaned up. The remaining gaps will be filled with additional tack welds and ground flush until the seam virtually disappears.MCR’s Pro Spot spot welder can reach fairly deep into most panels.But not quite all the way to the bottom so some plug welding will be necessary. The screw holes will need to be filled as well but both will be ground smooth.Plug weld locations get a single sided spot weld so they look factory like the rest of the spot welds. This is what’s required to obtain a museum quality resto. This door jamb will look factory perfect when completed. The finished door jamb yields a perfect door to quarter gap and no evidence of a welded seam.
Mailing List & Sharing
Processing…
Success! You're on the list.
Whoops! There was an error and we couldn't process your subscription. Please reload the page and try again.